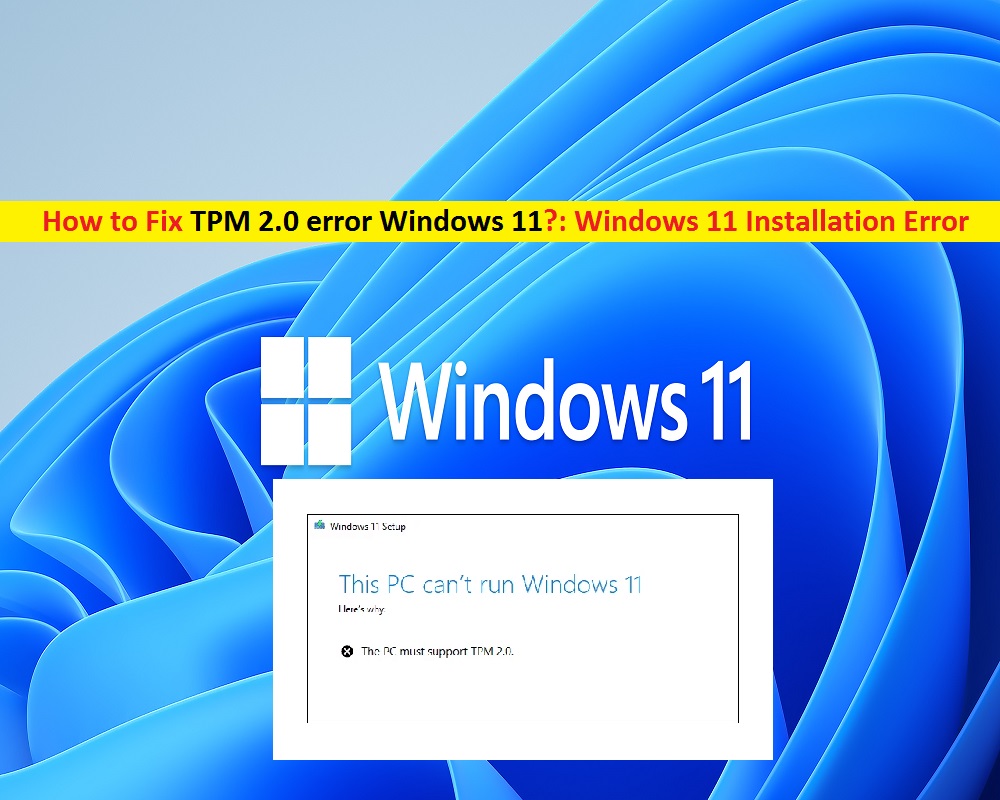
What is ‘TPM 2.0 error Windows 11’ – Windows 11 installation error?
If you facing ‘TPM 2.0 error Windows 11’ while trying to install Windows 11 – the latest Windows Operating System version in your computer, then you are in right place for the solution. Here, you will be guided with easy steps/methods to resolve the error. Let’s starts the discussion.
TPM in Windows 11: TPM stands for Trusted Platform Module which provides additional hardware-based and security-based feature inside the processor. Microsoft released recent Windows 11 OS as the latest Windows Operating System version and explained that there are some system requirements for installing and running Windows 11 on device, and TPM (Trusted Platform Module) is one of the core requirements for Windows 11.
In other words, you will need to enable TPM feature in your computer if you want to install and run Windows 11. You should also make sure your PC has TPM 2.0 version feature and it is enabled in your device otherwise, you can’t run Windows 11. If you are not aware, Microsoft released ‘PC Health Check’ App offers you to check if your Windows PC is allowed to run Windows 11.
This PC can’t run Windows 11 error: TPM 2.0 error
If Microsoft’s PC Health Check App shows ‘This PC can run Windows 11’ message as results after running the app, then you are allowed to install and run Windows 11 in your device without any issue. But if ‘PC Health Check’ App displays ‘This PC can’t run Windows 11’ message window, then there is something wrong in your device that’s why you are not allowed run Windows 11, and disabled TMP 2.0 and Secure Boot feature in your device is one of the core reason behind this error.
‘This PC can’t run Windows 11 error’ is appeared usually when you trying to install Windows 11 OS on computer without TPM 2.0 feature enabled. If TPM 2.0 is not enabled or don’t have on your computer, then you will receive ‘This PC can’t run Windows 11. The PC must support TPM 2.0’ error. This error might not be appeared if you have PC with Intel’s 4th generation or later processor and if you don’t, then you follow the instructions below to resolve the error.
How to fix TPM 2.0 error Windows 11?
Method 1: Check if TPM 2.0 is enabled in your device
You can check whether your computer supports TPM 2.0 or not by running TPM Management window.
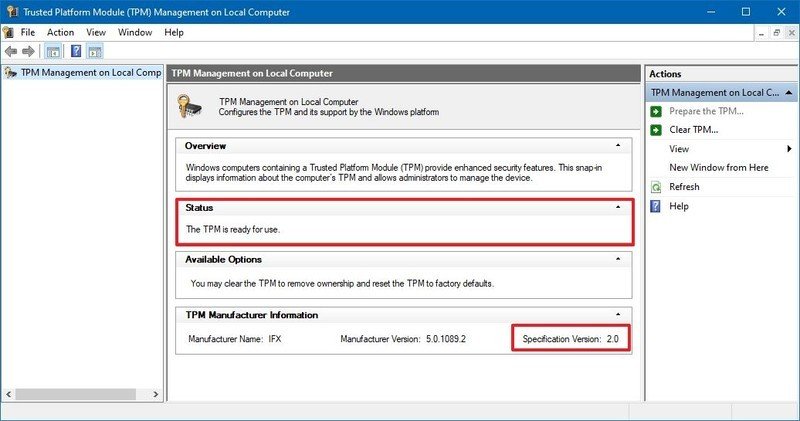
Step 1: Press ‘Windows + R’ keys on keyboard, type ‘tpm.msc’ in the opened ‘Run’ dialog box and hit ‘Ok’ button to open ‘TPM Management’ window
Step 2: In the opened window, check ‘Status’ and your ‘TPM Specification Version’. If it shows your device supports TPM 2.0, then try installing Windows 11 and check if the error is resolved.
Method 2: Enable TPM in BIOS Mode in Windows computer
It is recommended to enable TPM 2.0 in your device in order to install and run Windows 11 or upgrade from Windows 10 to Windows 11. If TPM is not enabled, you can enable it using BIOS Mode in computer.
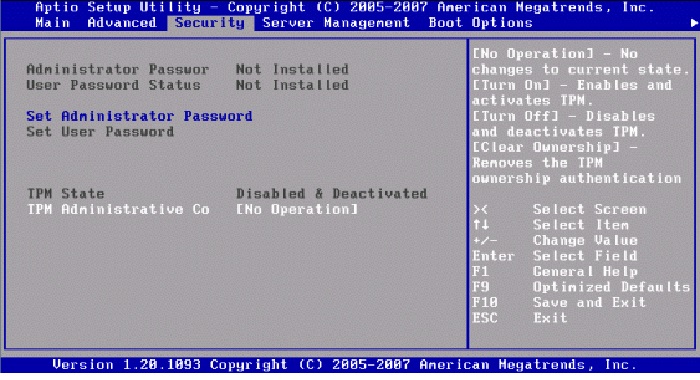
Step 1: Restart your computer and when restart initiate, press ‘F1’, ‘F2’, ‘F10’, ‘DEL’ key on keyboard to open BIOS/UEFI mode in computer (These keys may vary depending on your PC’s motherboard)
Step 2: Once you are in BIOS/UEFI Mode, using ‘Arrow’ key on keyboard, navigate to ‘Security’ tab
Step 3: Find ‘TPM’ and check if it is enabled. If not, select and change it to ‘Enabled’
Step 4: After that, save the changes & exit BIOS/UEFI mode, and restart your computer. After restart, try installing Windows 11 again and check if error is resolved.
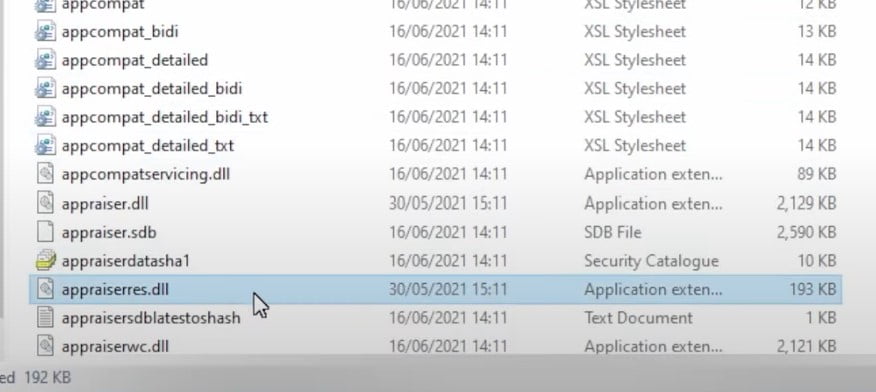
Method 3: Download appraiserres.dll file from Windows 10’s 21H1 build and replace it from appraiserres.dll in Windows 11 OS
One possible way to resolve ‘This PC can’t run Windows 11 – TPM 2.0 error’ is to replace the appraiserres.dll file from Windows 11 OS by the same DLL file from Windows 10’s 21H1 build. Once you successfully replaced appraiserres.dll file, you can try installing Windows 11 in your device. But before replacing the DLL file, make sure TPM 2.0 is enabled in your computer. You can enable TPM 2.0 using above method. Update your BIOS/UEFI firmware if required.
How to download and replace appraiserres.dll file in Windows 11?
Step 1: Open your browser and visit ‘Dllme.com page’ to download appraiserres.dll file or visit ‘https://www.dllme.com/dll/files/appraiserres_dll.html’ page
Step 2: Once the page opened, Download appraiserres.dll file and save it in your computer’s directory
Step 3: Open the location where appraiserres.dll file is saved, copy the file
Step 4: Now, mount the Windows 11 ISO that you have downloaded/purchased by right-click on Windows 11 ISO and select ‘Mount’.
Step 5: After mounting, go to ‘Sources’ folder inside Windows 11 ISO drive
Step 6: Find appraiserres.dll file and delete it. Now, paste the appraiserres.dll that you have copied in ‘step 3’
Step 7: Once done, try installing Windows 11 on your device and check if it works.
Conclusion
I am sure this post helped you on How to fix TPM 2.0 error Windows 11 with several easy steps/methods. You can read & follow our instructions to do so. That’s all. For any suggestions or queries, please write on comment box below.


