
What is ‘The service couldn’t be started Windows Defender’ error in Windows 10?
If you are experiencing ‘The service couldn’t be started Windows Defender’ while trying to open Windows built-in antivirus ‘Windows Defender’ in your Windows 10 PC, then you are in right place for the solution. Here, you will be guided with easy methods/steps to resolve the error. Let’s starts the discussion.
‘The service couldn’t be started’ error – Windows Defender error: It is common Windows problem associated with Windows built-in antivirus software ‘Windows Defender’. This error states The service couldn’t be started, either because it is disabled or because it has no enabled devices associated with it. This error window is appeared with error code 0x80070422 along with two buttons ‘Help’ and ‘Close’.
This error prevents you from protecting your Windows device against threats. In such case, you should make sure you have any third-party antivirus software installed in your computer that could help you to find and remove threats even when Windows Defender is not responding or is disabled. The possible reason behind ‘Windows Defender error code 0x80070422’ can be malware or viruses attack in computer. Some malware like Trojans or others are designed to block/corrupt services and components associated with Windows Defender and result in this error is appeared.
Sometimes, this error can also be occurred due to interference of your third-party antivirus software or other applications installed in your computer. In such case, you can disable your antivirus or the problematic software in order to fix the error. Another possible reason behind this error can be outdated Windows OS, corruption in system files or issues, disabled Windows Defender services, and other reasons. Let’s go for the solution.
How to fix The service couldn’t be started Windows Defender – error code 0x80070422 in Windows 10?
Method 1: Fix ‘The service couldn’t be started Windows Defender’ error with ‘PC Repair Tool’
‘PC Repair Tool’ is easy & quick way to find and fix BSOD errors, DLL errors, EXE errors, problems with programs, malware or viruses issue, system files or registry issues, and other system issues with just few clicks. You can get this tool through button/link below.
Method 2: Run SFC Scan in Windows 10
You can run SFC scan to repair system files corruption issue in order to fix this error.
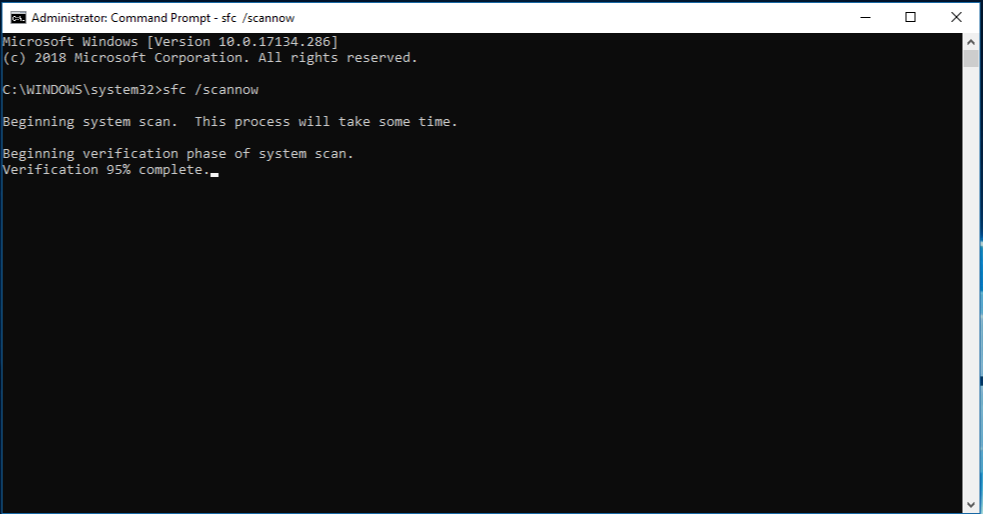
Step 1: Press ‘Windows + X’ keys on keyboard and select ‘Command Prompt as Administrator’
Step 2: Type ‘sfc /scannow’ command and hit ‘Enter’ key to execute
Step 3: Wait to complete the process. Once done, restart your computer and check if the error is resolved.
Method 3: Uninstall your third-party antivirus software
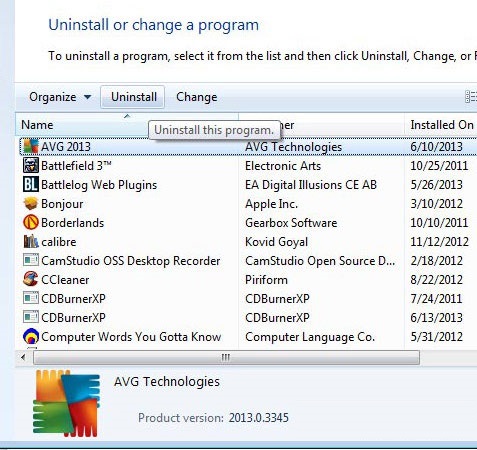
Sometimes, this error is occurred due to interference of your third-party antivirus or there is software conflict between Windows Defender and your third-party antivirus. In such case, you can disable your third-party antivirus software in your computer in order to fix the issue.
To do so, right-click on ‘antivirus’ icon on ‘System Tray’ and select ‘Disable’, ‘Stop’ to similar options to disable it. If disabling third-party antivirus didn’t work for you, then you can uninstall your third-party antivirus software completely in your computer in order to fix the issue.
Method 4: Modify Windows Defender Service
This Windows Defender error occurs usually due to disabled Windows Defender service. You can re-enable it in order to fix the issue.
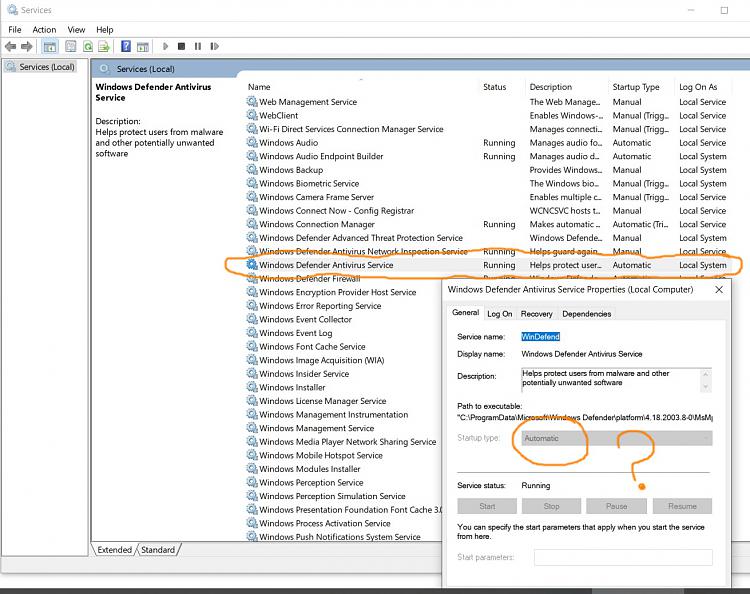
Step 1: Press ‘Windows + R’ keys on keyboard, type ‘services.msc’ in the opened ‘Run’ dialog box and hit ‘OK’ button to open ‘Services’ window
Step 2: Find and double-click on ‘Windows Defender’ service in the list of services to open its ‘Properties’
Step 3: In ‘Properties’ window, select ‘Automatic’ from ‘Startup Type’ dropdown, and select ‘Start’ button under ‘Service Status’ section.
Step 4: Finally, click on ‘Apply’ and ‘OK’ button to save the changes and then restart your computer. After restart, please check if the Windows Defender error is resolved.
Method 5: Fix ‘The service couldn’t be started Windows Defender’ using Registry Editor
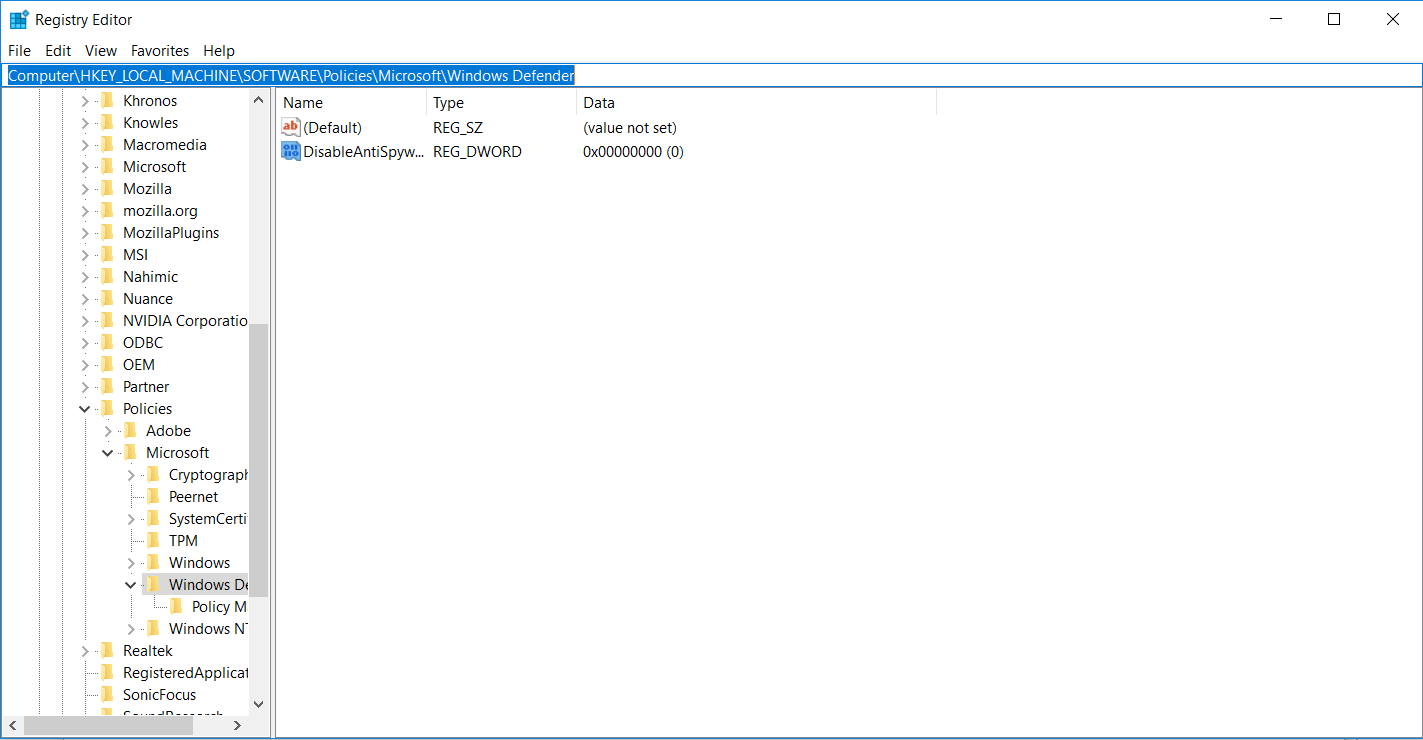
Step 1: Press ‘Windows + R’ keys on keyboard, type ‘regedit’ in the opened ‘Run’ dialog box and hit ‘Ok’ button to open ‘Registry Editor’
Step 2: Navigate to following path
HKEY_LOCAL_MACHINE > SYSTEM > CurrentControlSet > Services
Step 3: Now, find and right-click on ‘WinDefend’ key under ‘Services’ folder in left pane, and select ‘Permissions….’
Step 4: In the opened window, click on ‘Advanced’ and navigate to ‘Owner’
Step 5: Click on the name of your account under ‘Change owner to:’ select it and then hit ‘Apply’ and ‘Ok’ to save the changes
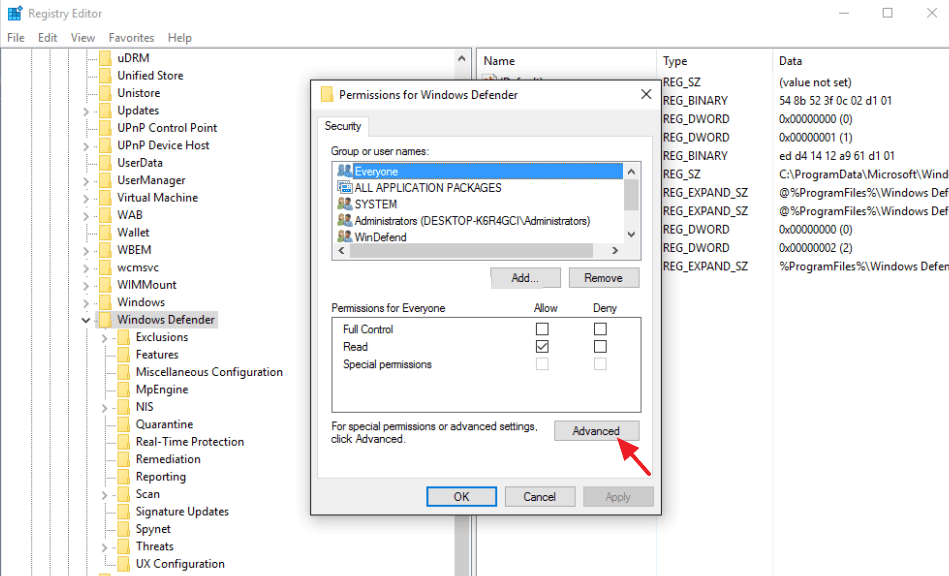
Step 6: Now, back to ‘Permissions’ dialog box, click on ‘Administrators’ under ‘Group or User names’ and select it.
Step 7: Click on ‘Allow’ checkbox on ‘Full Control’ under ‘Permissions for Administrators’ and then hit ‘Apply’ and then hit ‘Ok’ to save
Step 8: After that, click on ‘WinDefend’ key in left pane in order to see its content
Step 9: Find and double-click on ‘Start’ value in right pane, sets its value data to ‘2’ and hit ‘Ok’ to save the changes
Step 10: Once done, restart your computer and check if the error is resolved.
Method 6: Update Windows 10 OS
Updating Windows 10 OS to latest build can resolve any issue in your Windows computer and improve performances as well.
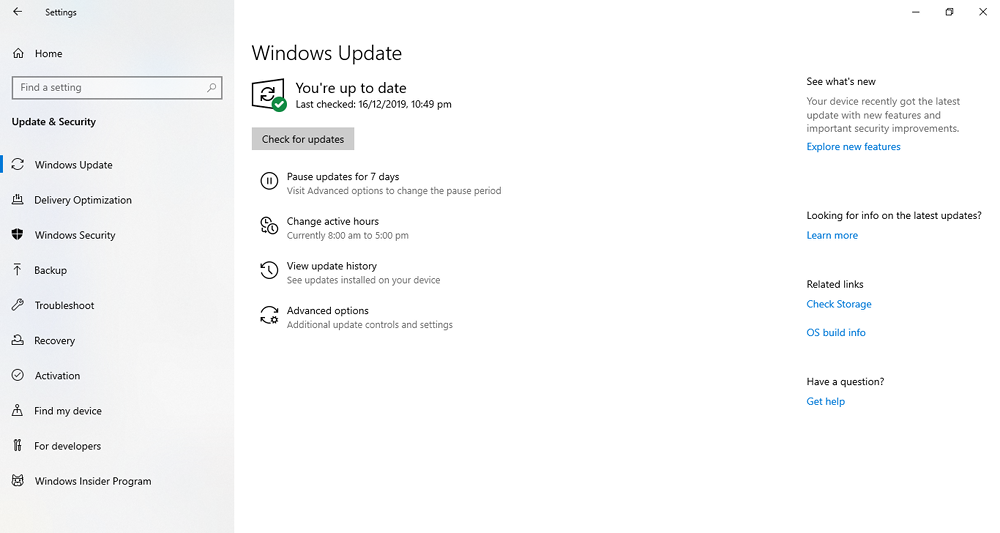
Step 1: Press ‘Windows + I’ keys on keyboard to open ‘Settings’ App in Windows 10
Step 2: In ‘Settings’ App, go to ‘Update & Security > Windows Update’ and click on ‘Check for updates’ button
Step 3: This will automatically download and install the available Windows update in your computer. Once done, restart your computer to see the changes and check if the Windows Defender error is resolved.
Method 7: Create new user account in Windows 10
Another possible way to resolve the issue is to create a new user account and sign-in with newly created account.
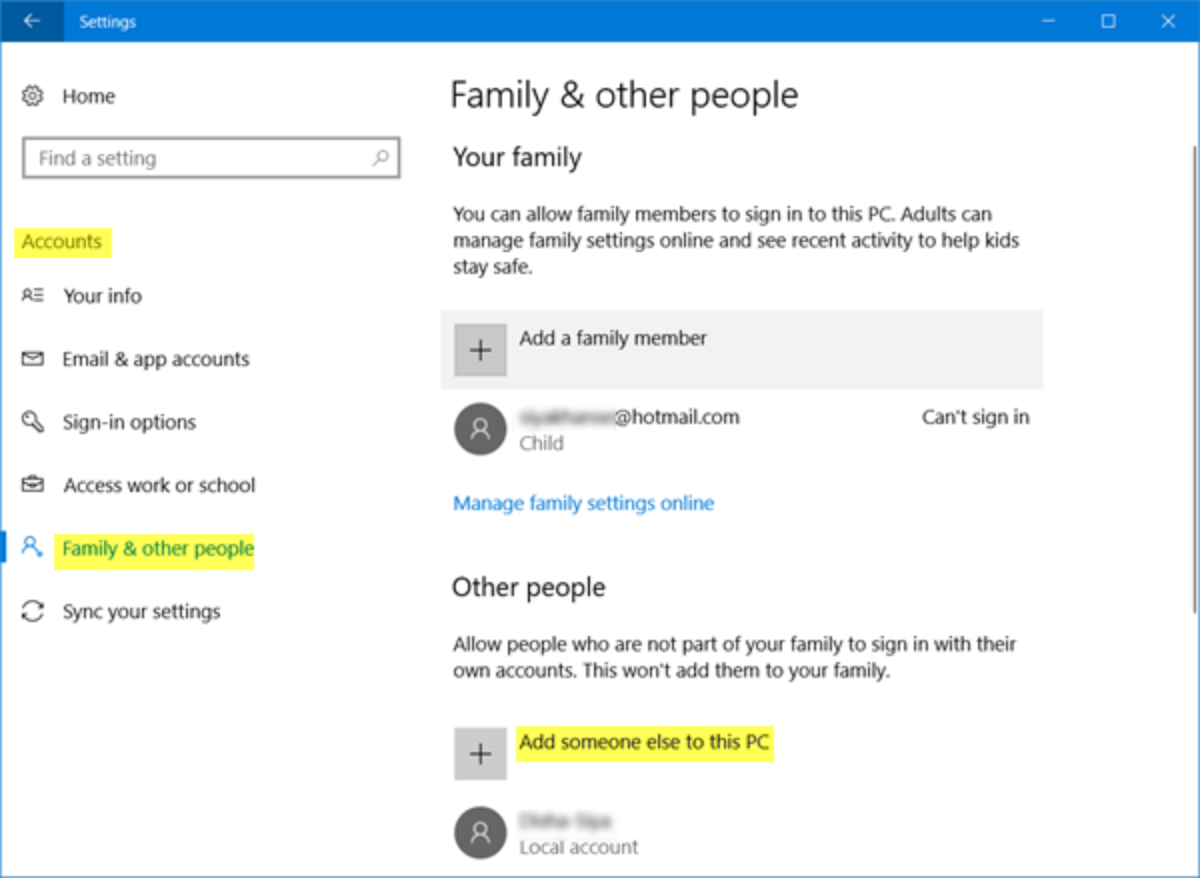
Step 1: Open ‘Settings’ App using above method and go to ‘Accounts > Family & other people > Add someone else to this PC’
Step 2: Select ‘I don’t have this person’s sign-in information > Add a user without Microsoft Account’
Step 3: Now, enter the desired username and then hit ‘Next’.
Step 4: Once done, restart your computer and login with newly created user account, and check if Windows Defender error is resolved.
Method 8: Run System Scan for malware or viruses with SpyHunter antivirus software
Sometimes, this type of error is occurred due to malware or viruses attack in computer. You can fix the issue by running system scan for malware or viruses with SpyHunter AntiVirus Software. This software offers you to find and remove all threats including latest malware or viruses in computer. You can get this tool through button/link below.
Method 9: Reinstall Windows 10
If the problem is still persist, then you can try to fix the issue by performing an in-place Windows upgrade or reinstall Windows 10.
Step 1: Open your browser and visit ‘Microsoft Official site’. Download and run ‘Media Creation Tool’
Step 2: On the ‘Media Creation Tool’ page, select ‘Upgrade this PC now’ and wait while setup prepares the necessary files
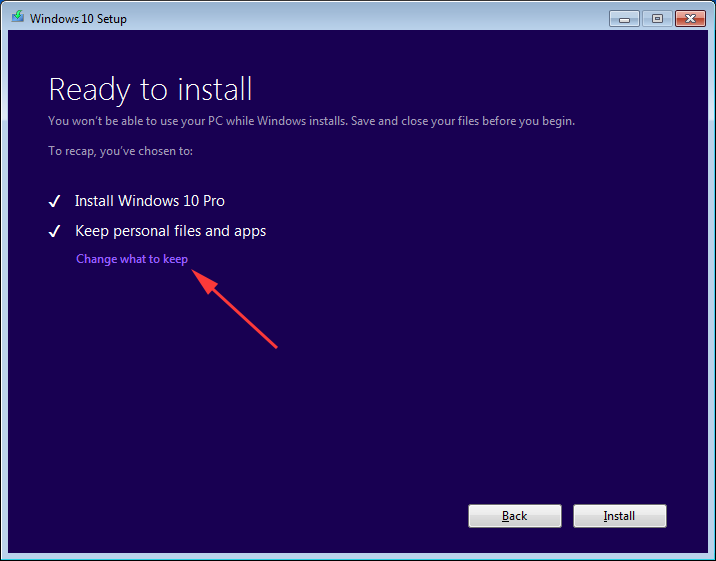
Step 3: Now, select ‘Download and install updates (Recommended)’ and follow on-screen instructions until you see ‘Ready to install’ screen.
Step 4: Select ‘Keep personal files and apps’ option or click ‘Change what to keep > Keep personal files and apps’
Step 5: Follow on-screen instructions to finish the process. Once done, reboot your computer and check if the error is resolved.
Conclusion
I am sure this post helped you on How to fix The service couldn’t be started Windows Defender error code 0x80070422 in Windows 10 with several easy steps/methods. You can read & follow our instructions to do so. That’s all. For any suggestions or queries, please write on comment box below.


