What is ‘Dolby Atmos not working’ issue in Windows 10?
In this post, we are going to discuss on “How to fix Dolby Atmos not working Windows 10”. You will be guided with easy automatic and manual methods to resolve the issue. Let’s starts the discussion.
‘Dolby Atmos’: Dolby Atmos is one of most advanced digital sound system with visual audio enhancements that offers you to improve your video, graphics or gaming experience. Dolby Atmos also supplements he conventional 5.1 or 7.1 Audio Configuration by allowing your run multi-channel movie soundtracks. It makes 3D audio output and provides the one of best video and gaming experience. It is quite simple to install and enable Dolby Atmos in Windows 10.
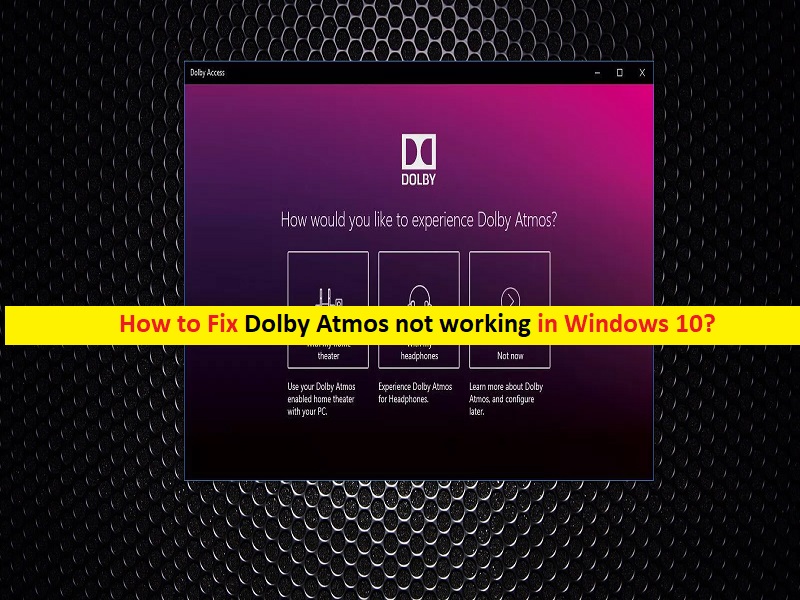
To do so, open your browser and navigate ‘Microsoft official site’, search and download Dolby Atmos app for Windows 10. After downloading and installing, click on ‘Launch’ button to open the ‘Dolby Atmos’ app. This will show you the option to select from ‘With your Dolby Atmos Home Theatre System’, ‘with my headphones’, or ‘Not now’, and then follow on-screen instructions to continue using the impressive experience offered by ‘Dolby Atmos’ on your home theatre system or your headphones that support Dolby Atmos technology.
However, several Windows 10 users reported that they faced ‘Dolby Atmos not working Windows 10’ while they tried to open ‘Dolby Atmos’ app and causes ‘No Sound’ issues on their Windows computer especially when Dolby Atmos failed to opened on Windows 10. The issue indicates you couldn’t hear any sound your Windows computer for some reasons and it is occurred usually when you tying to open or connect with Dolby Atmos Home Theatre Mdoe.
The possible reason behind this issue corrupted or outdated audio drivers, or some files/components with your sound card driver is missing or corrupted in computer. You should make sure your sound card driers is up-to-date and if not, you need to update your sound drivers in order to fix this issue and ‘No Sound’ issue in Windows 100.
Updating sound driver can fix sound related issue in computer and improve performances. If you are facing the same issue, then you are in right place for the solution. Let’s go for the solution.
How to fix Dolby Atmos not working Windows 10?
Method 1: Fix ‘Dolby Atmos not working’ issue with ‘PC Repair Tool’
You can fix your PC problems with ‘PC Repair Tool’ in order to resolve ‘Dolby Atmos not working’ issue. This software offers you to find and fix BSOD errors, EXE errors, DLL errors, malware or viruses issues, system files or registry issues, and other system issues with just few clicks. You can get this tool through button/link below.
Method 2: Update Sound driver in Windows 10
Outdated or corrupted sound card driver could be one possible reason for the problem. You can fix the issue by updating the driver.
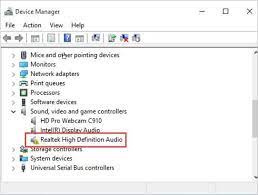
Step 1: Press ‘Windows + X’ keys on keyboard and select ‘Device Manager’
Step 2: locate and expand ‘Sound, video and game controllers’ category
Step 3: Right-click on all sound card driver under this category one-by-one, and select ‘Update Drivers’
Step 4: Follow on-screen instructions to finish update process and after that, restart your computer to see the changes and check if the trouble is resolved.
Step 5: Right-click on ‘Sound/Volume’ icon on ‘System Tray’ and select ‘Spatial Sound (Dolby Atmos for Headphones)’ and check if it is configured. If not, follow on-screen instructions to do so.
Step 6: Now, play the supported content and check if issue is resolved.
Update Sound card driver [Automatically]
You can also try to update your sound card driver and all other Windows drivers with ‘Automatic Driver Update Tool’. This software will automatically find the latest updates for all Windows drivers and then install them into computer. You can get this tool through button/link below.
Method 3: Rollback Sound driver
If updating sound driver to latest version didn’t work, then you can rollback the driver to its previous versions.
Step 1: Open ‘Device Manager’ and expand ‘Sound, video and game controllers’ category
Step 2: Right-click on your each sound card driver one-by-one and select ‘Properties’
Step 3: In ‘Properties’ window, click on ‘Driver’ tab and click on ‘Rollback Driver’. Follow on-screen instructions to finish the process and then restart your computer. After that, re-enable ‘Spatial Sound’ and check if the trouble is resolved.
Method 4: Run ‘Playing Audio Troubleshooter’
Windows 10 built-in ‘Playing Audio’ troubleshooter can help you to fix this issue. Let’s try.
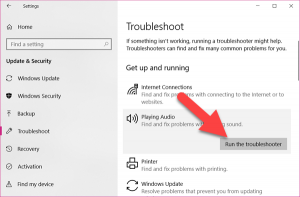
Step 1: Press ‘Windows + I’ Keys on keyboard to open ‘Settings’ App in Windows 10
Step 2: Go to ‘Update & Security > Troubleshoot’
Step 3: Select ‘Play Audio’ troubleshooter and click on ‘Run the troubleshooter’ button under this.
Step 4: Follow on-screen instructions to finish troubleshooting and then restart your computer
Step 5: After restart, right-click on ‘Sound’ icon on ‘System Tray’ and select ‘Spatial Sound’ option and try enabling Dolby Atmos again.
Method 5: Enable Exclusive Mode options
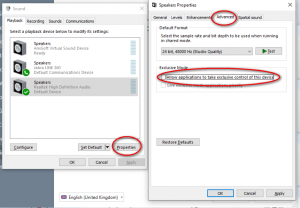
Step 1: Right-click on ‘Sound’ icon on ‘System Tray’ and select ‘Playback Devices’
Step 2: In the opened window, right-click on your default playback device under ‘Playback’ tab and open ‘Properties’
Step 3: In next window, select ‘Spatial Sound’ tab and select ‘Dolby Atmos for headphones’ from dropdown if not selected
Step 4: Now, click on ‘Advanced’ tab and under ‘Exclusive Mode’, enable both ‘Allow applications to take exclusive control of this device ‘ and ‘Give exclusive application priority’
Step 5: Finally, click on ‘Apply’ and ‘Ok’ to save the changes and check if the ‘Dolby Atmos not working’ issue is resolved.
Method 6: Reconfigure Dolby Atmos for device or try Sonic
You can also try to resolve the issue by reconfiguring Dolby Atmos in your Windows 10 computer.
Step 1: Connect your headphones, buds or earphones to your computer and also connect Home Theatre if you want to configure
Step 2: Now, right-click on ‘Sound’ icon on ‘System Tray’ and select ‘Playback Device’
Step 3: In the opened window, right-click on your ‘Default Playback Device’ and select ‘Properties’
Step 4: Click on ‘Spatial Sound’ tab and select ‘Dolby Atmos’ option from dropdown.
Step 5: Now, download and install Dolby Atmos App in Windows 10 and run the software
Step 6: Now, select whether to configure headphones or home theatre and click on ‘Begin Setup’
Step 7: Select ‘Configure PC Settings’ and select ‘Dolby Atmos for headphones’ from dropdown
Step 8: Try listing sound for different sound output and check if works.
Note: If the issue is still persist, then you can try Windows 10 built-in Windows Sonic. There is no need to download or reinstall it separately. To enable this feature, follow ‘step 1 to step 3’ mentioned above, and click on ‘Spatial Sound’ tab and select ‘Windows Sonic for headphones’ from dropdown and hit ‘Ok’ to save.
Method 7: Update Windows 10
Updating Windows 10 to latest version can fix this type of issue.
Step 1: Open ‘Settings’ App and go to ‘Update & Security > Windows Update’
Step 2: Click on ‘Check for updates’ button. This will automatically download and install the available Windows update in computer. Once done, restart your computer to see the changes and check if the trouble is resolved.
Conclusion
I am sure this article helped you on How to fix Dolby Atmos not working Windows 10 with several easy steps. You can read & follow our instructions to do so. That’s all. For any suggestions or queries, please write on comment box below.


