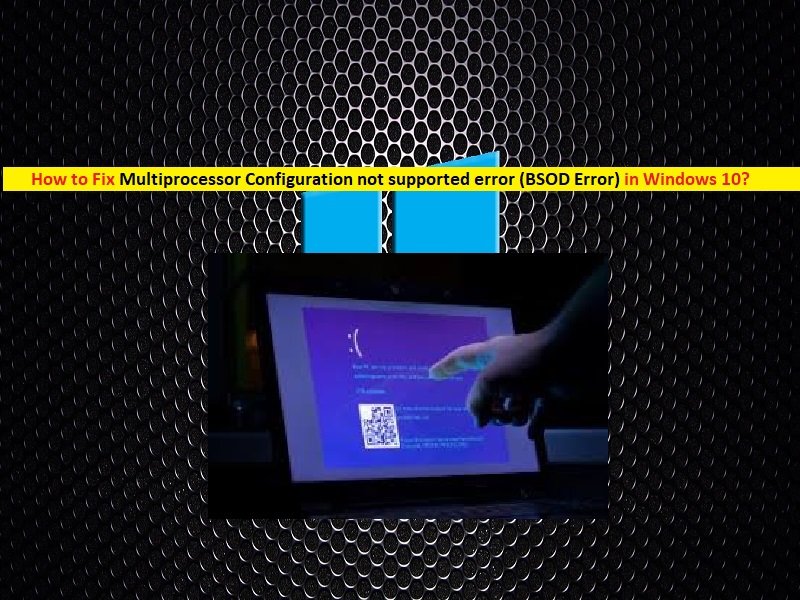
What is Multiprocessor Configuration not supported error (BSoD) in Windows 10?
If you are facing ‘Multiprocessor Configuration not supported error’ – Blue Screen of Death (BSoD) error on your Windows 10 computer, then you are in right place for the solution. Here, you will be guided with easy automatic and manual methods to resolve the issue. Let’s starts the discussion.
‘MULTIPROCESSOR_CONFIGURATION_NOT_SUPPORTED BSoD error’: It is common Windows problem associated with Blue Screen of Death (BSoD) error. This BSOD error can occur in the middle of your work on computer or during Windows boot/reboot. This error prevents you from accessing or open your Windows desktop.
This Blue Screen of Death error is appeared with the message saying ‘Your PC ran into a problem and needs to restart. We’re just collecting some error info, and then we’ll restart for you’. Multiprocessor Configuration not supported error is usually caused by a bug check with Error Code 0x0000003E. The error indicates your computer’s processors are asymmetric relation to one another. In such case, you can upgrade your all processors of same type and level in order to resolve the issue.
Outdated or corrupted Windows drivers could be another possible reason for this problem. You should make sure there is not issue with hardware device connected/integrated into your computer and its connection, and also check if drivers for each hardware device are up-to-date. To check the status of your Windows driver, you can open ‘Device Manager’ in your Windows 10 computer, expand each device category and check if any device is showing ‘Yellow Mark’ on it. If yes, then driver update is necessary.
How to fix Multiprocessor Configuration not supported error (BSOD) in Windows 10?
Method 1: Fix ‘MULTIPROCESSOR_CONFIGURATION_NOT_SUPPORTED BSoD error’ with ‘PC Repair Tool’
‘PC Repair Tool’ is easy & quick way to find and fix BSOD errors, DLL errors, EXE errors, problems with programs, malware or virus issues, system files or registry issues, problems with programs and other system issues with just few clicks. You can get this tool through button/link below.
Method 2: Update your Windows 10 Drivers
Outdated or corrupted device drivers in Windows 10 can cause this type of issue. You can resolve the issue by updating the device drivers.
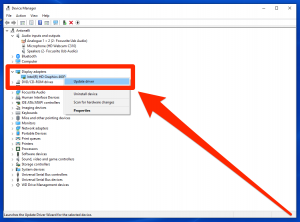
Step 1: Press ‘Windows + X’ keys on keyboard and select ‘Device Manager’
Step 2: Expand each device category one-by-one and look for device showing ‘Yellow Mark’ on it, right-click on it and select ‘Update Driver Software’
Step 3: Follow on-screen instructions to finish update process. Repeat the same steps to update all necessary drivers
Step 4: Once done, restart your computer to see the changes and check if he trouble is resolved.
Update Windows 10 drivers [Automatically]
You can also try to update all Windows drivers with ‘Automatic Driver Update Tool’. This software will automatically find the latest updates for all Windows drivers and then install them into computer. You can get this tool through button/link below.
Method 3: Update Windows 10
Updating Windows 10 OS can resolve any issue in Windows computer and improve performances as well. Let’s try.
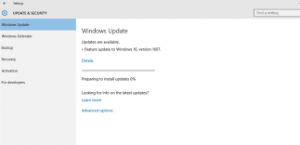
Step 1: Press ‘Windows + I’ keys on keyboard to open ‘Settings’ App in Windows 10
Step 2: Go to ‘Update & Security > Windows Update’ and click on ‘Check for updates’ button
Step 3: This will automatically download and install the available Windows update in computer. Once done, restart your computer to save the changes and check if the problem is resolved.
Method 4: Upgrade your BIOS to latest build and enable ‘Virtualization Technology’
If the problem is still persist, then you can try to resolve the issue by updating your BIOS (Basic Input Output System) of your computer. Updating BIOS is advanced steps so you should be extra careful while performing it if you wish to skip causing any permanent damage. The procedure to update your BIOS depends on your PC’s motherboard model.
To update your BIOS, you can read your computer’s motherboard instructions manual or you can visit official website of your PC’s motherboard manufacturer for this. Additionally, you can enable ‘Virtualization Technology’ in order to resolve the issue. Note that not all processors support this feature ‘Virtualization Technology’. You should make sure that your processor supports this feature. To enable this feature, you need to enter into your PC into BIOS settings and then you can enable it or you can check instructions provided your PC’s motherboard manufacturer to do so.
Method 5: Downgrade BIOS
Some users reported, this issue can be fixed by installing older version BIOS in computer. So, if updating BIOS steps mentioned above didn’t work, then you can try to fix the issue by downgrading BIOS. To downgrade your BIOS, you can follow your PC’s motherboard manufacturer instructions and apply this in your computer.
Method 6: Turn OFF/Disable ‘CPUID Value Limit’, ‘Hyperthreading’ and ‘Multiple CPU cores’ in BIOS settings
Another possible way to resolve this issue is to disable certain features including ‘CPUID Value Limit’, ‘Hyperthreading’ and ‘Multiple CPU cores’ in BIOS settings. Before you can try this method, you should make sure if ‘CPUID Value Limit’, ‘Hyperthreading’ and ‘Multiple CPU cores’ options are available on your BIOS. Once you have sure about this, you can follow your PC’s motherboard manufacturer instructional manual to disable these features in BIOS settings and cone done, please check if the problem is resolved.
Method 7: Run SFC Scan
SFC (System File Checker) –Windows 10 built-in tool offers you to repair system files in order to resolve the issue.
Step 1: Press ‘Windows + X’ keys on keyboard and select ‘Command Prompt as Administrator’
Step 2: Type ‘sfc /scannow’ command and hit ‘Enter’ key to execute
Step 3: Wait to complete the process. Once done, restart your computer and check if the trouble is resolved.
Other Methods:
Step 1: You should make sure that there is no issue with hardware device connected/attached/integrated into your computer. If any hardware device is casing this issue, you can remove them or replace with new one I order to resolve the issue.
Step 2: (For those users that have two CPUs on their motherboard) you should make sure your computer have identical CPUs on your motherboard. If not, you need to replace one of them in order to fix the issue.
Conclusion
I am sure this article helped you on How to fix Multiprocessor Configuration not supported error in Windows 10 with several easy steps. You can read & follow our instructions to do so. That’s all. For any suggestions or queries, please write on comment box below.


