
Many Windows users may encounter Windows Resource Protection could not start the repair service error problem while trying to repair Windows system files by using the built-in system file checker tool. It is a Microsoft Windows tool which is located in C:\Windows\System32 folder.
This tool allows you to repair corrupted system files and Windows missing files such as .DLL files through Command Prompt. On the other hand, Windows Resource Protection is a feature in Windows Vista that replaces Windows File Protection. It protects registry keys and folders in addition to critical system files.
This service can only be managed by using Supported Resource Replacement Mechanism along with TrustedInstaller (Windows Modules Installer) service. Its main function is to enable installation, removal and modification of Windows update and optional system components.
If Windows Modules Installer fails to work correctly, then you will receive an error message through Command Prompt when trying to run SFC scan. To fix it, we have provided multiple tips below. Some of which might help you to solve Windows Resource Protection could not start the repair service error problem.
Procedure 1: Run SFC/Scannow in Safe Mode: SFC is one of the most useful inbuilt tools integrated in any Windows system. It is capable of scanning your computer or laptop for any kind of error and corrupt features and try to repair them effectively. Safe mode is diagnostic mode of a computer operating system. It also refers to mode of operation by application software. Running this tool might help you to solve this problem. To do so, follow the steps:
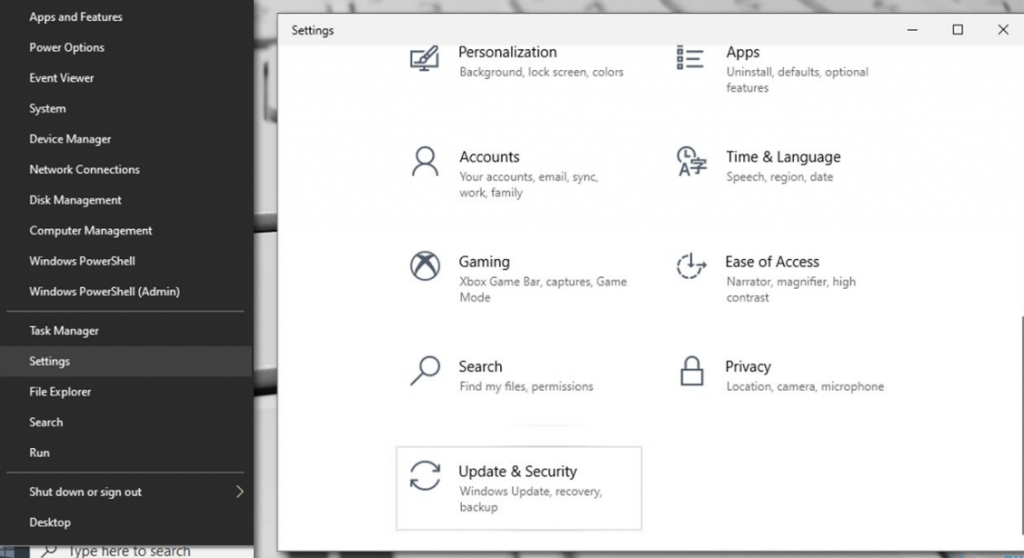
Right-click on Start and pick Settings > Go to Update & Security.
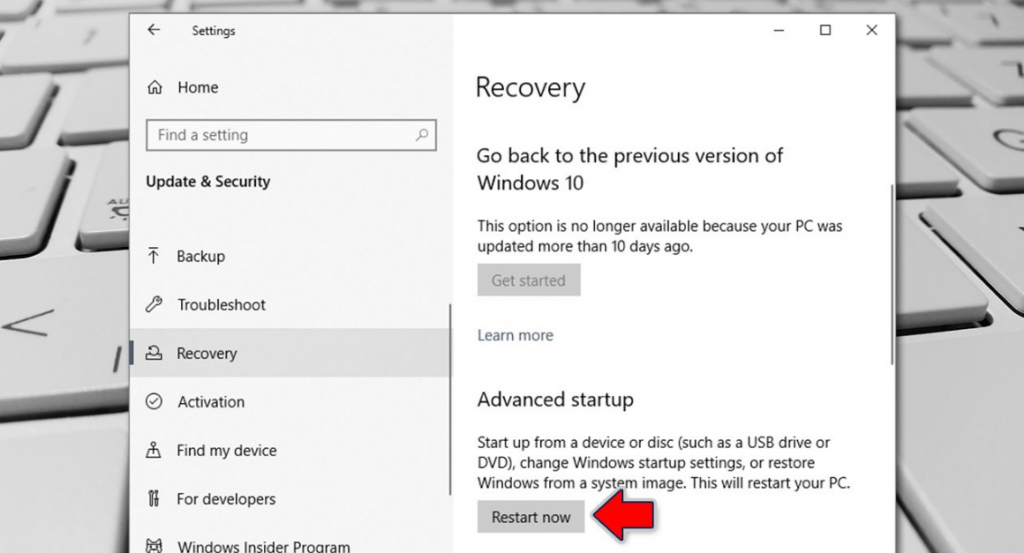
Pick Recovery on the left > On the right, scroll down until you see Advanced startup section > Click Restart now.
Once PC rebooted, choose following options: Troubleshoot > Advanced Settings > Startup Settings > Restart
In startup settings, press F5 to access Safe mode with networking
In Safe mode, go through the following steps:
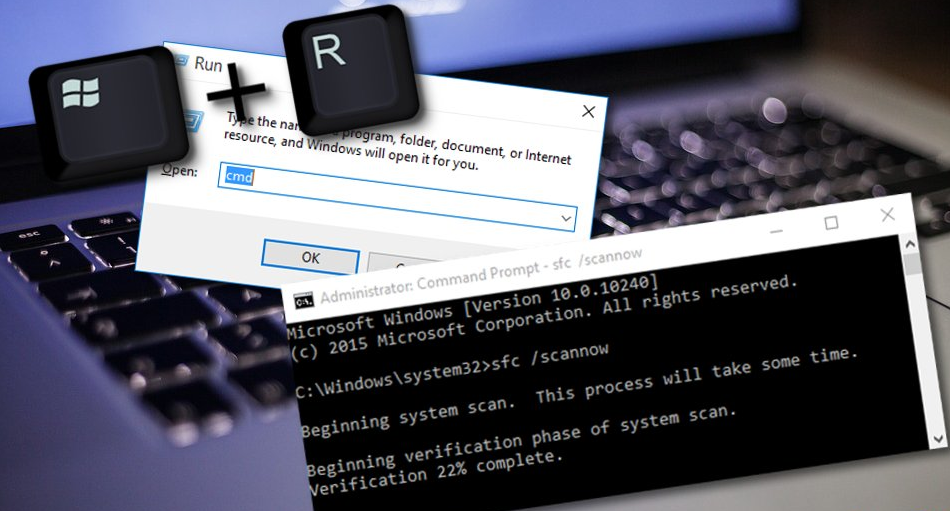
Press the Win key + R > type “cmd”.
Launch the Command Prompt service > Choose to Run as an Administrator.
Afterward, type sfc /scannow after the blinking cursor.
Procedure 2: Scan the system by using system repair tool: Like we mentioned earlier, such kind of perilous issues may occur due to system file corruption. If SFC scan cannot fix such problem then users are highly advised to use automatic system repair tool. This tool is capable of detecting and removing the damaged or corrupted system files within minutes.
Procedure 3: Enable Windows Module Installer services: It is an essential Windows update system process that looks for updates and installs them on your PC. In other words, the service enables user to install, modify and remove Windows update and optional components. In case, if this service somehow got disabled, then you can try enabling it again. To do so, follow the below steps:
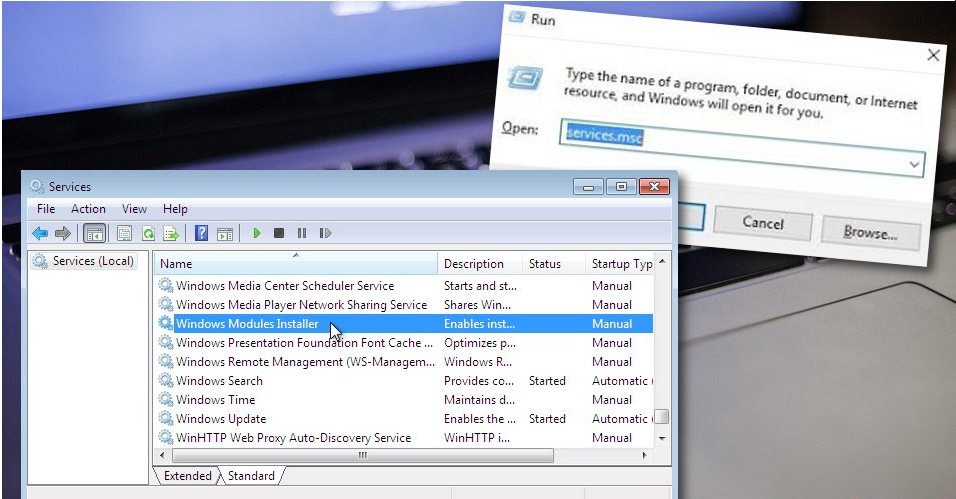
Press Win + R > type “service.msc” > and press Ok
Locate Windows Modules Installer > Right-click on the services > opt for properties
Choose manual as the startup type if it is not already the default settings.
To save the changes, select the apply button.
Procedure 4: Update your Windows PC: By going all the above methods, if you still encounter problems then installing the latest update helped you to solve the problem. Keeping your PC up-to-date is very important. Therefore, install all required updates by going below mentioned steps:
Go to Windows search and type “cmd”.
Launch Command Prompt and make sure that it is running as an Administrator.
Then, type wuauclt.exe /updatenow after the blinking cursor.
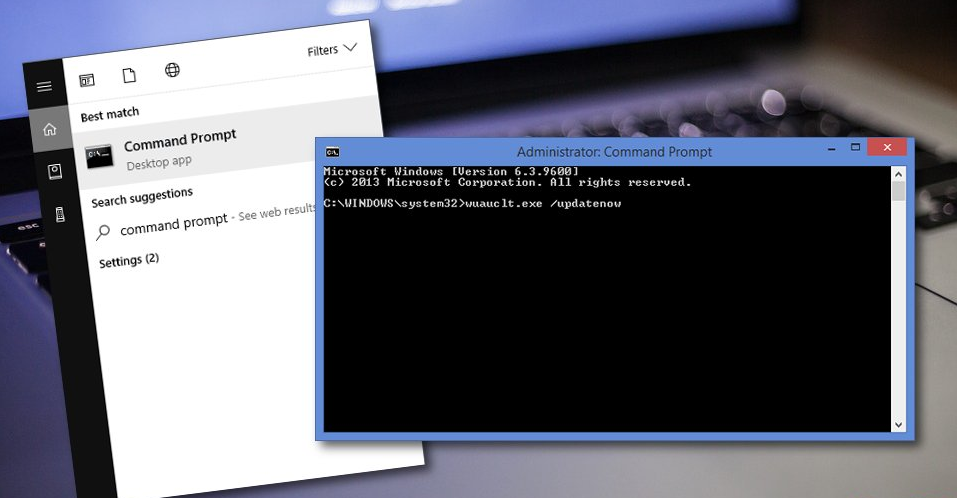
Hit Enter and wait for the process to finish.
Allow the command to run for approximately one hour.
Afterward, restart your machine and see if the problem was resolved.
Procedure 5: Run DISM tool: DISM stands for Deployment Image Servicing and Management. It is a command line tool that can be used to repair and prepare Windows image including Windows Setup, Windows Recovery Environment and Windows PE. To perform DISM scan, you need to follow below steps:
Hold the Win key and R button > Type “cmd” in the small run box.
Make sure that Command Prompt is running as admin.
Continuously, type DISM /Online /Cleanup-Image /RestoreHealth.
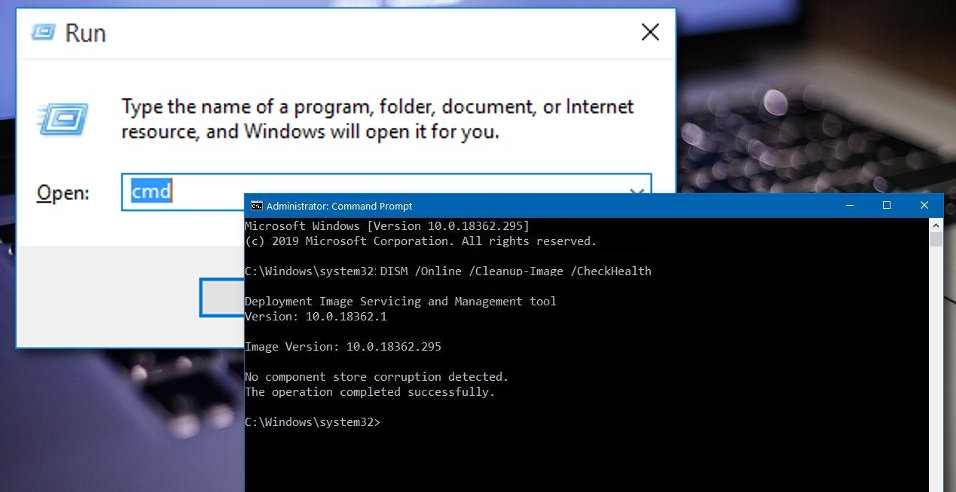
Press Enter and wait for the process to finish.
Restart your computer and check if the error still persists.
Recommended Solution
The above mentioned solutions will work to solve Windows Resource Protection could not start the repair service error problem. But in case, if you are not able to perform the solutions due to lack of advanced knowledge in the PC, then you are recommended to use PC Repair Tool. This is an advanced tool that protects your system from file loss as well as fixes various errors such as DLL error, Update error, BSOD error and others. It will detect and fix all types of internal errors.
Conclusion:
I hope this post helped you to fix Windows Resource Protection could not start the repair service error in Windows 10 with several easy steps/methods. To do so, you can read and follow our instructions. That’s all. If you have any doubts and queries, please write on comment box below.


