What is ‘Microphone is not working’ Issue in Windows 10?
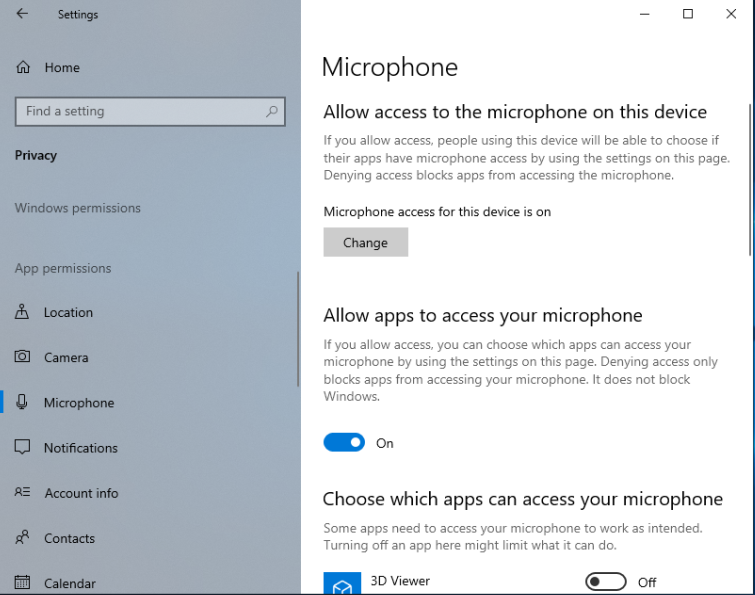
‘Microphone is not working’ or ‘No Sound from Microphone in Windows 10’ is common issue occurs in Windows computer due to several reasons. One possible reason behind the issue can be disabled Microphone options in ‘Microphone Privacy Settings’ in Windows 10. You should make sure that your Microphone is allowed in Microphone privacy Settings and check if ‘Microphone access for this device is ON’. If it says your microphone is OFF, then you need to turn ON your Microphone by clicking ‘Change’ button.
Also, Microphone is not working issue occurs possibly due to problematic audio drivers. Note that audio drivers are important applications required to communicate your sound card (hardware) with your Operating System. Missing, corrupted, outdated or incompatible audio driver can cause ‘No sound from Microphone in Windows 10’ or similar issue in computer. So, sound driver update is necessary.
Another possible reason behind ‘Microphone is not working’ issue can be problematic Microphone hardware and poor physical connection. You should make sure that your Microphone device (external) is properly connected to your computer and the hardware (both internal & external microphone) is in good condition. If everything (hardware and physical connection) is in working condition, then it might possible that the problem with System causes this issue like audio input is muted on your computer, conflict between external microphone and internal microphone.
If you are facing ‘Microphone is not working’ issue while trying to access Microphone with specific application like Skype, then Microphone Privacy Settings could be possible reason behind the issue. Make sure that specific application like Skype is allowed to access your Microphone in ‘Microphone Privacy Settings’. If not, you need to turn ON the Microphone for apps in settings to access microphone. Let’s go for the solution.
How to fix Microphone is not working Issue in Windows 10?
Method 1: Fix ‘Microphone is not working’ Issue with ‘PC Repair Tool’
In this post, you will be guided with easy manual and automatic method to fix the issue. If you don’t have enough time or knowledge to implement manual steps, then you can try ‘PC Repair Tool’. This software offers you to find and fix BSOD errors, EXE errors, DLL errors, registry errors, problem with programs or files, malware or viruses issues, and other System issues with just few clicks. This way, you can fix ‘Microphone is not working’ issue. You can get this tool through link/button below.
Method 2: Update Sound card drivers in Windows 10
Outdated or corrupted sound card drivers can cause ‘No sound’, ‘audio not working’, ‘Microphone is not working’ or similar issue. You can fix the issue by updating the audio driver.
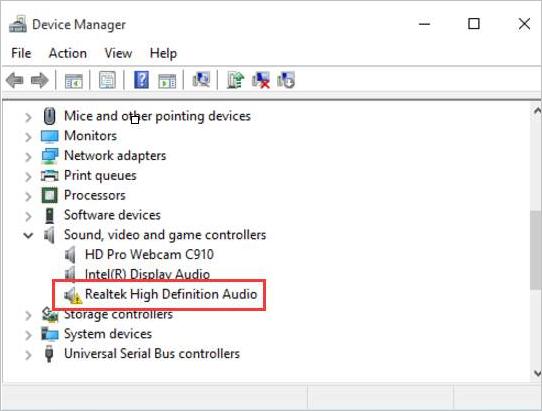
Step 1: Press ‘Windows + X’ keys together on keyboard and select ‘Device Manager’
Step 2: In the opened ‘Device Manager’, locate and expand ‘Sound, video and game controllers’ category
Step 3: Right-click on your sound card and select ‘Update Driver’
Step 4: Select ‘Search automatically for updated driver software’ and follow on-screen instructions to finish update process.
Step 5: Once done, restart your computer to see the changes and check if the trouble is resolved.
Update Sound card drivers in Windows 10 [Automatically]
You can also try to update sound drivers or other System drivers with ‘Automatic Driver Update Tool’. This software will automatically find and install the latest update for System drivers. You can get this tool through link/button below.
Method 3: Set your microphone as default recording device
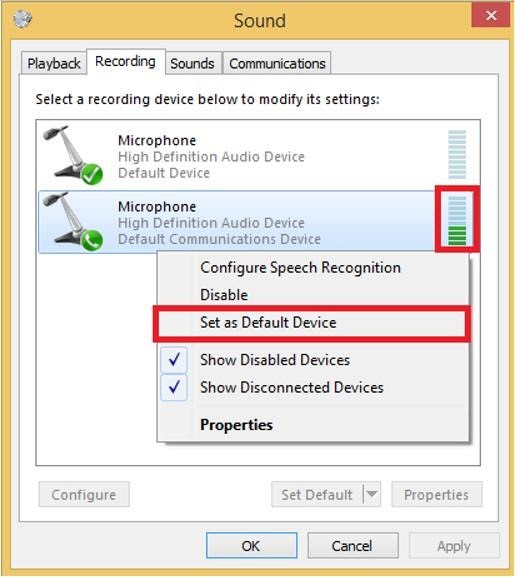
Step 1: Right-click on ‘Sound’ icon on System Tray and select ‘Recording Devices’
Step 2: In the opened ‘Sound’ window, under ‘Recording’ tab, check if your microphone is enabled. If not, right-click on it and select ‘Enable’
Step 3: If you can’t see your microphone, then right-click on empty space on ‘Sound’ window and select ‘Show disabled devices’
Step 4: Now, right-click on your microphone and select ‘Set as default device’. This will show ‘Green tick’ on your microphone and the default device line.
Method 4: Disable Hands-Free On Bluetooth Devices
If you are using Bluetooth device and at the same time you would like to use a standalone microphone, then you should make sure that hands-free mode has been disabled.
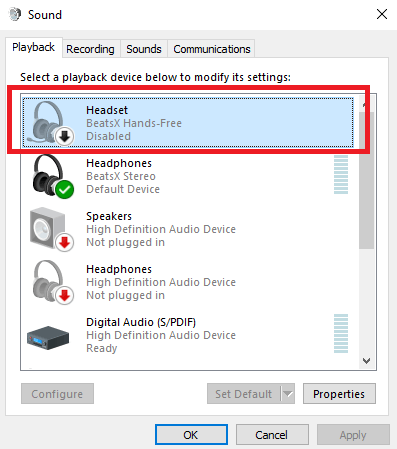
Step 1: Follow ‘Step 1’ of above method to open ‘Sound’ window and under ‘Recording’ tab
Step 2: Now, find any hands-free Bluetooth devices, right-click on it and select ‘Disable’
Step 3: Once done, please check if the trouble is resolved.
Method 5: Allow Apps to access your Microphone
As mentioned above, if specific application like Skype is not allowed to access microphone in ‘Microphone privacy settings’, then you can’t access the microphone with the same app. So, you need the make certain changes in microphone settings.
Step 1: Press ‘Windows + I’ keys together on keyboard to open ‘Settings’ App in Windows 10
Step 2: In the opened ‘Settings’ app, go to ‘Privacy > Microphone’
Step 3: Find the application like ‘Skype’ you are using, click on ‘ON/OFF’ toggle button to turn ON
Step 4: Turn ON ‘Allow apps to access your microphone’
Step 5: Once done, please check if problem is resolved.
Method 6: Increase the Volume of Microphone in Windows 10
Make sure that Microphone is not muted or low volume. Increase the volume to maximum to fix the issue.
Step 1: Right-click on ‘Sound’ icon on System Tray and select ‘Recording Devices’
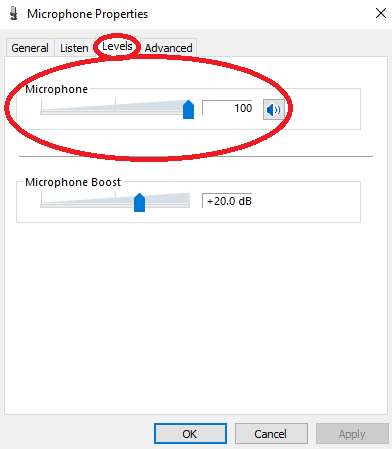
Step 2: In the opened ‘Sound’ window, under ‘Recording’ tab, double-click on your microphone to open its ‘Properties’
Step 3: In the opened ‘Microphone properties’, click on ‘Levels’ tab, and check if microphone is not muted, and increase the volume of microphone to maximum.
Step 4: Finally, click on ‘Apply’ and ‘Ok’ to save the changes and check if the trouble is resolved.
Method 7: Disable and re-enable microphone in ‘Device Manager’
You can fix the issue by disabling and re-enabling the microphone in Device Manager.
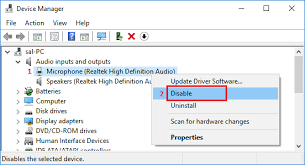
Step 1: Press ‘Windows + X’ keys together on keyboard and select ‘Device Manager’
Step 2: Locate and expand ‘Audio inputs and outputs’ category
Step 3: Right-click on your microphone and select ‘Disable Device’
Step 4: Wait for few seconds and then right-click on microphone again and select ‘Enable Device’. Check if the trouble is resolved.
Other methods:
Step 1: Disconnect your external microphone and reconnect to the correct audio port of computer.
Step 2: Check if Microphone cable and hardware is in good condition. If not, you can fix the issue by replacing the microphone with correct one. Or contact professional repair center to repair your microphone.
Step 3: Update your Windows 10 Operating System to latest version to fix the System issues like ‘Microphone is not working’ in windows 10
Conclusion
I am sure this post helped you on How to fix Microphone is not working Issue in Windows 10 with several easy steps/methods. You can read & follow our instructions to do so. If this post really helped you, then you can share the post with others to help them. That’s all. For any suggestions or queries, please write on comment box below.


