What is ‘Windows cannot find steam.exe error’ in Windows 10?
‘Steam’ is video game digital distribution service was released as ‘Standalone Software Client’ in 2003 by ‘Value’ – American video game developer, publisher, and digital distribution company. Steam offers server hosting, video streaming, DRM (digital rights managements) and social networking services.
Also, this video game digital distribution service offers a freely available API (Application Programming Interface) called ‘Steamworks’ – which developers can use to integrate many of steam’s functions & features into their products. This platform is available for Windows, MacOS, Android and iOS devices.
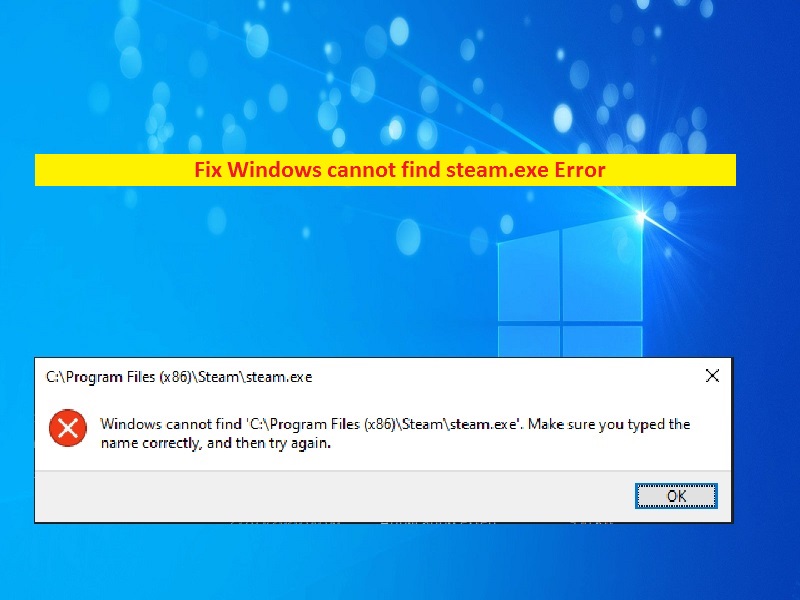
However, some users have reported that they are facing certain issues like ‘Windows cannot find steam.exe error’ with ‘Steam’ on their Windows 10 computer while they trying to open ‘Steam’. The error is appeared in popup window with ‘Ok’ button and states that ‘Windows cannot find steam.exe or C:\Steam\Steam.exe. Make sure you typed the name correctly, and then try again’.

One core reason of this type of System issue is malware or viruses attacks. Some malware or viruses are capable of infecting legitimate ‘steam.exe’ file and replacing the original file with malicious one, resulting, Windows can’t find ‘steam.exe’ file. This misleading exe file that uses ‘steam.exe’ file in malware campaign can cause other System issues. In such cases, you can try to find and remove all types of malware in computer with some powerful antivirus software and check if trouble is resolved.
Windows System registry issues can also cause ‘Windows cannot find steam.exe error’ in your Windows 10. It might possible that registry entry associated with ‘steam.exe’ has been corrupted or misconfigured. In such case, you need to fix registry issue in order to ‘Windows cannot find steam.exe’ issue. Let’s take a look at reason behind this error.
Reasons behind Windows cannot find steam.exe error:
- Antivirus software/Windows Defender: Sometimes, your Windows Defender or antivirus software can malfunction an cause a fake alert in which they might detect ‘Steam’ as virus while it is not. In such case, you can fix this issue by disabling your security programs temporarily.
- Malware or viruses attacks: As mentioned, ‘steam.exe’ can be malicious file replaced by some malware already installed in your computer. In sort, malware can cause this type issue. So, you can scan your computer with powerful security program to remove all threats and fix this issue.
- Administrative privileges: It might possible to get this error in Windows 10 when the administrative privileges are granted to ‘Steam’. So, you might just need to toggle those permissions to detect if they are causing the problem.
- Registry issues: As mentioned above, if registry entry related to ‘steam.exe’ or ‘steam’ in Windows 10 has been corrupted, then it might possible to get this type of error,
- Steam installation: If steam package is not installed properly in your computer, then you might face this error. In such case, you need to reinstall Steam application package to fix this issue.
- Temporary files: In some cases, temporary files might have been corrupted and due to which steam is acting up and blocking the steam.exe from being processed properly. This problem can cause ‘Windows cannot find steam.exe error’ in Windows 10
How to fix ‘Windows cannot find steam.exe error’ in Windows 10?
Method 1: Run Scan System for malware or viruses
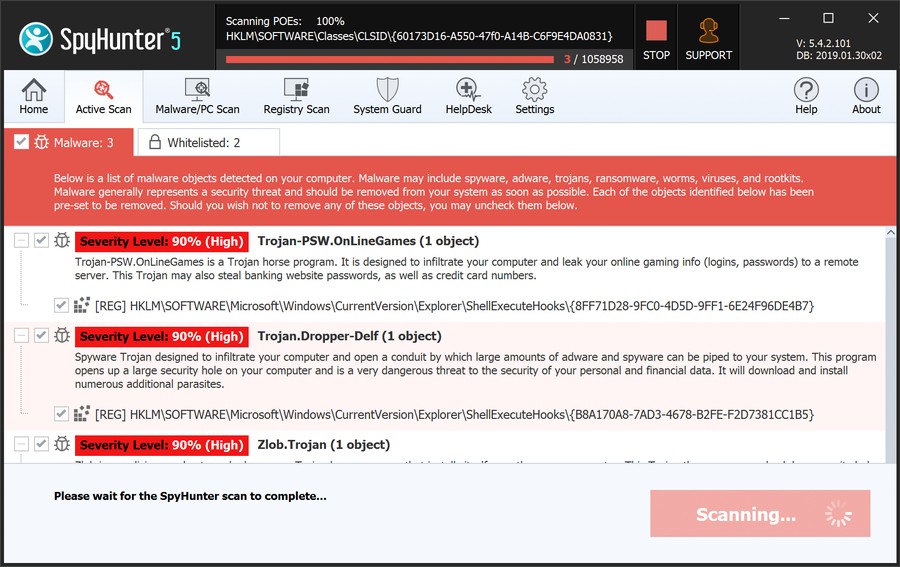
Malware or viruses attack could be one core reason behind this type of issue. So, you can fix the issue by running System scan with some powerful antivirus software. This tool offers you to find all types of malware or viruses including adware, PUAs, Trojans, or other infections in your computer, displays the scan results in user-readable format, and then you can delete all detected threats with just single-click. You can download ‘SpyHunter’ through ‘Download SpyHunter Tool’ link, and then install and run System scan to fix this type of issue.
Method 2: Taking away Admin Permissions
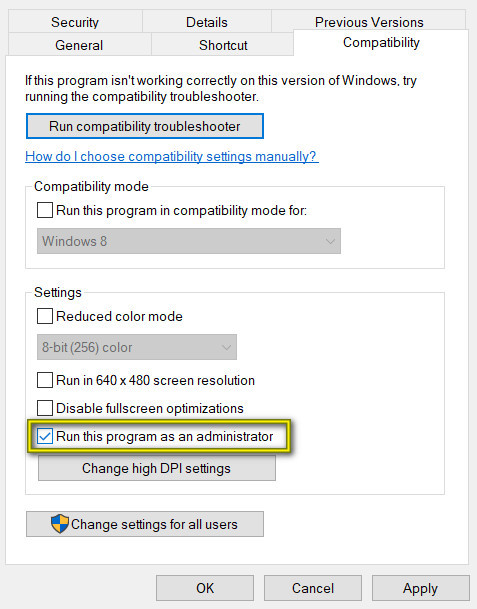
Step 1: Right-click on ‘Steam’ icon the desktop and select ‘Properties’
Step 2: In the opened ‘Properties’ window, click on ‘Compatibility’ tab, uncheck ‘Run this program as an administrator’ and then hit ‘Ok’
Step 3: Now, restart your ‘Steam’ app and check if trouble is resolved.
Method 3: Change Registry settings
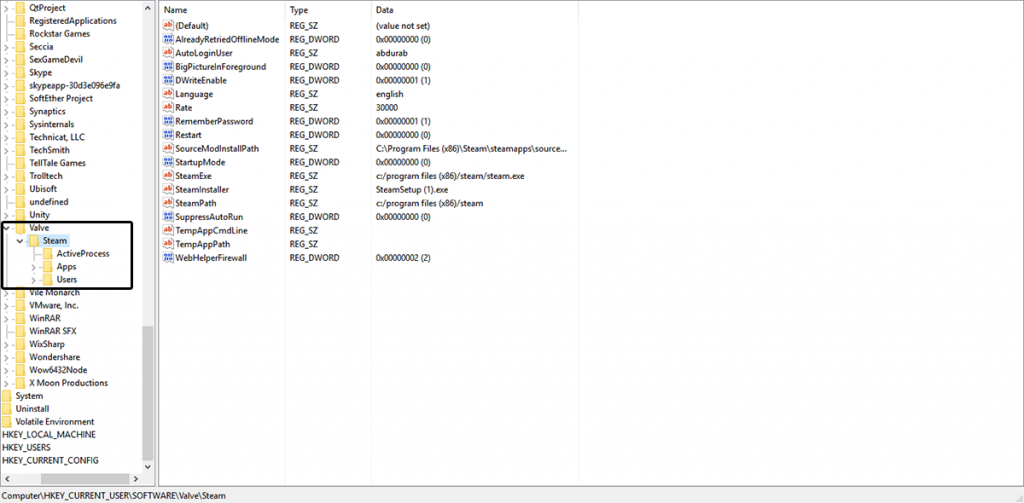
Step 1: Press ‘Windows + R’ keys together from keyboard to open ‘Run’ dialog box
Step 2: Type ‘regedit’ in ‘Run’ dialog box and hit ‘Enter’ key to open ‘Registry Editor’
Step 3: Navigate the following location:
HKEY_LOCAL_MACHINE\SOFTWARE\Microsoft\Windows NT\CurrentVersion\Image File Execution Options
Step 4: Find ‘Steam.exe’ in left pane and delete the file from the list. Once done, please check if trouble is resolved.
Method 4: Renaming the executable file
Step 1: Right-click on ‘steam’ icon on the desktop and select ‘Open File Location’
Step 2: Right-click on ‘Steam.exe’ file in the opened file location and select ‘Rename’
Step 3: Rename the filename to ‘steamabc.exe’ and check if trouble is resolved.
Method 5: Add ‘Steam’ to ‘Exception List’ on your Antivirus Software
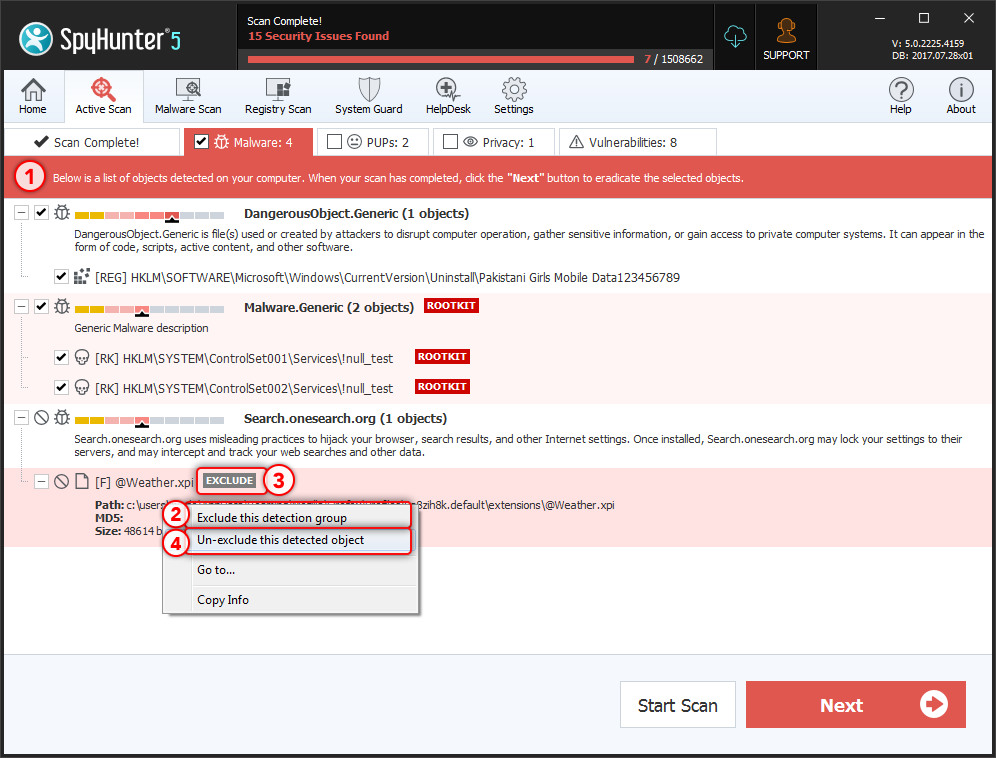
Some antivirus software doesn’t go well with ‘Steam’ application and causes the conflict with Steam installation files. It might possible that ‘steam Client’ has been flagged by your antivirus software that’s why you are getting ‘Windows cannot find steam.exe error’. In such case, you can fix this issue by adding steam as an exception on your antivirus software. Here, we are taking example of ‘Spyhunter’ antivirus software.
To add ‘Steam’ application to ‘Exception List’ on ‘SpyHunter’ – antivirus software, follows the steps below:
Step 1: Click on ‘SpyHunter Scanner’ dropdown when the ‘SpyHunter Scanner’ tab is active and select ‘Exclusions Manager’
Step 2: Find ‘Steam’ in the list of items in ‘Exclusions Manager’, right-click on it and select ‘Add Item to Exclusions’.
Note: If you are want to remove ‘steam’ or any item from your exclusions list, click the checkbox to the left of item’s name (steam) in ‘Exclusions Lists’ and then hit ‘Remove from Exclusions’ button.
Method 6: Uninstall antivirus software
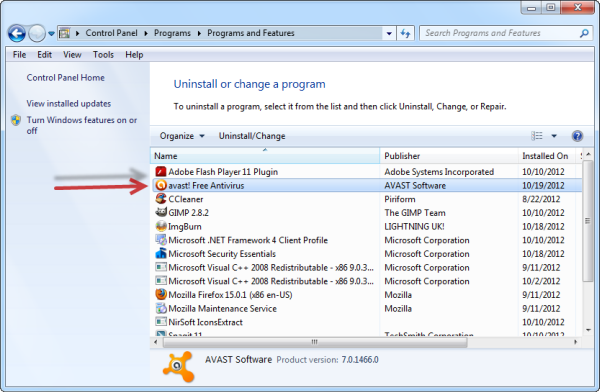
If you are still facing this error even after adding the ‘steam’ to the exclusion list on your antivirus software, then you can uninstall your antivirus software.
Step 1: Open ‘Control Panel’ and go to ‘Apps & Features’
Step 2: Find your antivirus software in list and select ‘Uninstall’ to remove, and follow on-screen instructions to finish uninstallation.
Step 3: Once done, please check if the trouble is resolved.
Method 7: Disable Windows Defender Firewall
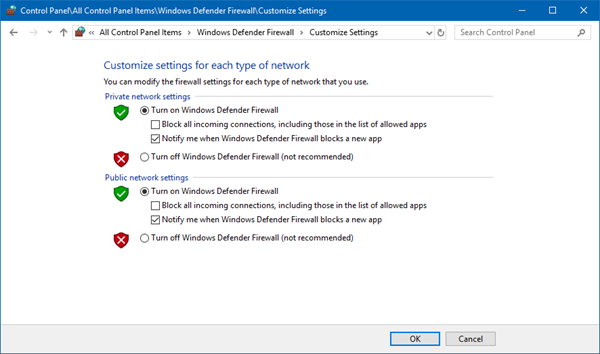
Step 1: Open ‘Control Panel’ and go to ‘Windows Firewall’
Step 2: In the opened ‘Windows Defender Firewall’, click on ‘turn Windows Defender ON or OFF’ in left pane
Step 3: Check the ‘Turn OFF Windows Defender Firewall’ checkboxes under both ‘Private network settings’ and ‘Public network settings’ section
Step 4: Once done, please check if trouble is resolved.
Method 8: Run SFC and DISM Tool
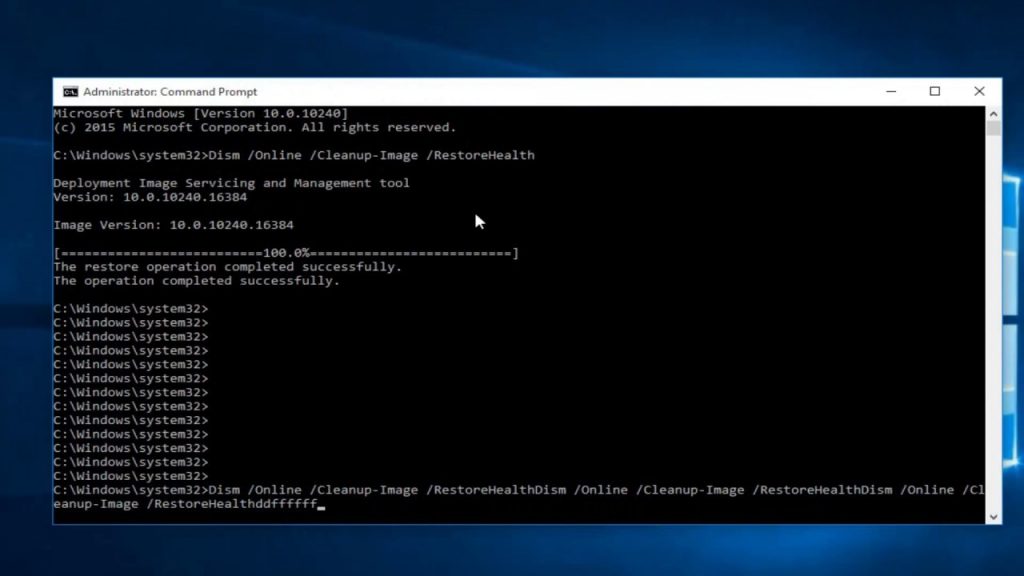
This tool in Windows 10 offers you to find and fix System files related issues.
Step 1: Press ‘Windows + X’ keys together on keyboard and select ‘Command Prompt as Administrator’
Step 2: In the opened ‘Command Prompt’, type the following command one-by-one and hit ‘Enter’ key after each.
sfc /scannow
DISM.exe /Online /Cleanup-image /Scanhealth
DISM.exe /Online /Cleanup-image /Restorehealth
DISM.exe /online /cleanup-image /startcomponentcleanup
Step 3: Wait to complete the process. Once done, close ‘Command prompt’ and check if problem is resolved.
Method 9: Disk Cleanup in Windows 10 to remove temporary files
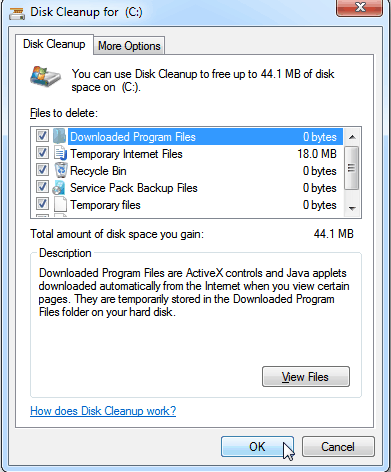
Step 1: Click on ‘Start’ button and type ‘Disk Cleanup’ in Windows Search box and open ‘Disk Cleanup’
Step 2: Select your drive like ‘C:’ and then hit ‘Ok’
Step 3: Under ‘Files to delete’, select the file types to get rid of. And then select ‘Ok’. Once done, please check if problem is resolved.
Method 10: Perform System Restore
If you are unable to fix this issue with steps mentioned above, then you can go with ‘System Restore’ to fix.
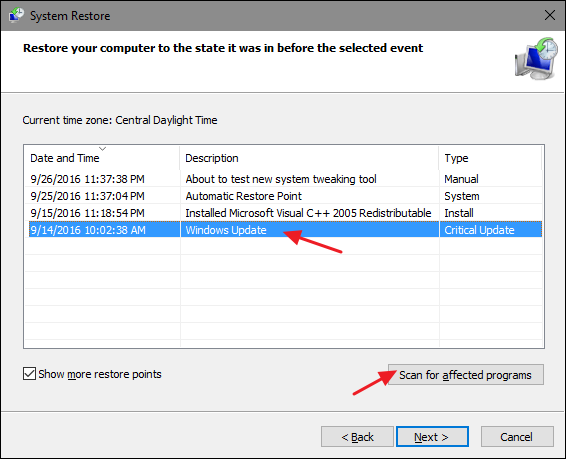
Step 1: Click on ‘Start’ button and type ‘System Restore’ in Windows Search and open it
Step 2: In the opened ‘System Restore’, select a restore point and hit ‘Next > Finish’
Step 3: Wait to finish restore operation. Once done, please check if ‘Windows cannot find steam.exe error’ is resolved.
Method 11: Reinstall Steam App
If Steam app is not installed properly, then it can trigger errors. You can fix this issue by uninstalling and reinstalling the app.
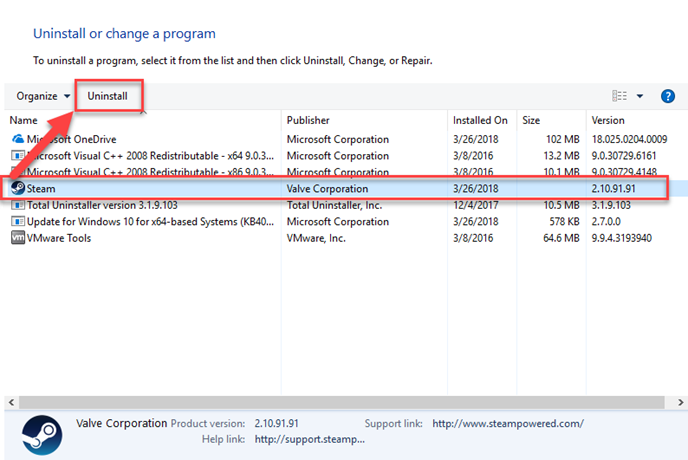
Step 1: Press ‘Windows + I’ keys together from keyboard to open ‘Settings’ App
Step 2: In the opened ‘Settings’ App, go to ‘Programs & Features’
Step 3: Find ‘Steam’ application, right-click on it, and select ‘Uninstall’
Step 4: Follow on-screen instructions to finish uninstall process. Once done, open your browser and download ‘Steam Desktop Client’ again
Step 5: Double-click on downloaded setup file and follow on-screen instructions to finish installation.
Step 6: After installation is finished, copy the ‘Steamapps’ folder, and paste it in the ‘steam’ folder and check if trouble is resolved.
Method 12: Fix ‘Windows cannot find steam.exe error’ in Windows 10 with ‘PC Repair Tool’ [Recommended Solution]
PC Repair Tool offers you to find and fix Dll errors, registry errors, BSoD errors, applications issues, protect your System from viruses or malware programs and many other System issues. So, you can try this tool to fix ‘Windows cannot find steam.exe’ problem in Windows 10. You can download ‘PC Repair Tool’ through ‘Download PC Repair Tool’ link.
Get PC Repair Tool to fix Windows cannot find steam.exe error in Windows 10
Conclusion
I am sure this post helped you on How to fix Windows cannot find steam.exe error in Windows 10 with several easy methods. You can read & follow our instructions to do so. That’s all. For any suggestions or queries, please write on comment box below.


