What is ‘Windows 10 crashes in Safe Mode’ issue?
In this post, we are going to discuss on “How to fix ‘Windows 10 crashes in Safe Mode’ issue”. You will be guided with easy steps/methods to resolve the issue. Let’s starts the discussion.
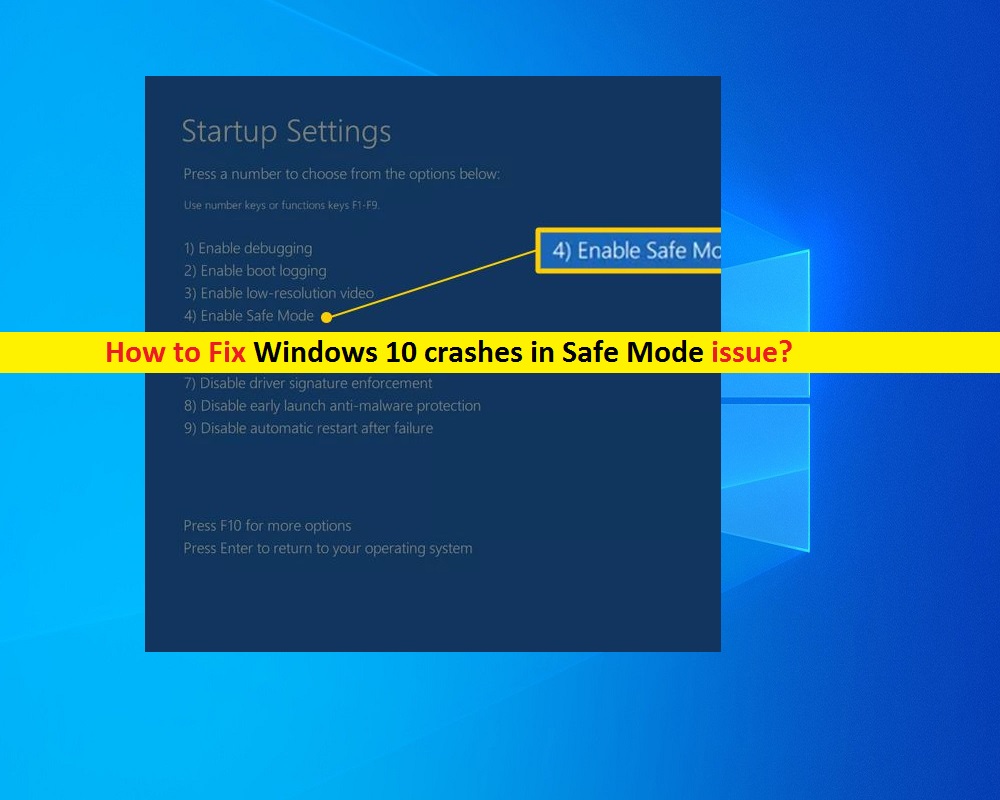
Safe Mode in Windows 10: Safe Mode is Windows built-in diagnostic startup mode which disables all the third-party applications, services and drivers. When you start Windows 10 in Safe Mode, it only loads basic drivers that are required for basic functioning of Windows so you can resolve the issue on your computer.
For example, if you are facing continuously Windows 10 crashes issues, then you can start your Windows 10 in Safe Mode and then perform necessary operations in order to fix the issue. Sometimes, just starting Windows 10 in Safe Mode fixes several Windows issues. However, when the Windows 10 computer crashes in Safe Mode or even worse it randomly freezes in Windows 10 Safe Mode, then it might possible that something went wrong in your PC that’s why you facing this issue.
Usually, you start Windows 10 in Safe Mode when the computer starts crashing and freezing in Windows 10 Normal Mode and this way, you can troubleshoot the issue. But if the issue is still persist in Windows 10 Safe Mode means Windows 10 computer is still crashes even in Safe Mode, then there could be several reasons behind the issue.
The possible reason behind ‘Windows 10 crashes in Safe Mode’ issue can be corruption in System files or registry, corrupted hard disk drives or images, corrupted or bad memory sectors in RAM, malware or viruses attacks in computer, issue with hardware device attached/integrated into computer, and others. Let’s go for the solution.
How to fix ‘Windows 10 crashes in Safe Mode’ issue?
Method 1: Fix Windows PC issues with ‘PC Repair Tool’
If this issue is occurred due to some problems with your Windows computer, then you can fix the issue with ‘PC Repair Tool’. This software offers you to find and fix BSOD errors, DLL errors, EXE errors, problems with programs, malware or viruses issues, system files or registry issues and other system issues with just few clicks. You can get this tool through button/link below.
Method 2: Run SFC Scan, DISM Scan and CHKDSK Scan in Windows 10
You can run SFC Scan to repair system files, run DISM scan to repair hard disk image, and run CHKDSK scan to repair hard disk drive issues in order to fix this problem.

Step 1: Press ‘Windows + X’ keys on keyboard and select ‘Command Prompt as Administrator’
Step 2: Run SFC Scan. Type ‘sfc /scannow’ command and hit ‘Enter’ key to execute
Step 3: Once executed, run CHKDSK scan. Type ‘chkdsk C: /f’ command and hit ‘Enter’ key to execute
Step 4: Once executed, run DISM scan. Type the following command one-by-one and hit ‘Enter’ key after each to execute
Dism /Online /Cleanup-Image /CheckHealth
Dism /Online /Cleanup-Image /ScanHealth
Dism /Online /Cleanup-Image /RestoreHealth
Step 5: Wait to complete the process. Once done, restart your computer and check if ‘Windows 10 crashes in Safe Mode’ issue is resolved.
Method 3: Enable ‘Legacy Advanced Boot Menu’ and boot using last known configuration
Step 1: Open ‘Command Prompt as Administrator’
Step 2: Type the following command and hit ‘Enter’ key to execute
BCDEDIT /SET {DEFAULT} BOOTMENUPOLICY LEGACY
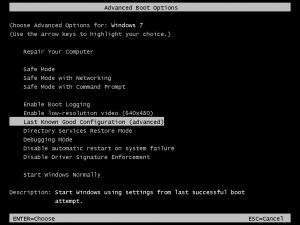
Step 3: This command will enable Legacy Advanced Boot Menu. Now, restart your computer and when booting initiate, press ‘F8’ or ‘SHIFT + F8’ keys on keyboard to see ‘Advanced Boot Options’ screen
Step 4: Using arrow key on keyboard to select ‘Last Known Good Configuration (Advanced)’ option. After that, please check if the issue is resolved.
Step 5: To disable ‘Legacy Advanced Boot Menu’ option, enter the following command in Command Prompt as Administrator.
BCDEDIT /SET {DEFAULT} BOOTMENUPOLICY STANDARD
Method 4: Run Windows 10 Automatic Repair
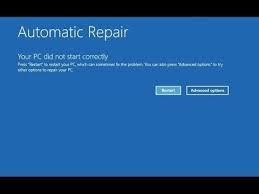
Another possible way to resolve the issue is to run Windows 10 Automatic Repair. This will offers you to start Windows from external device, change Windows startup settings or restore Windows from factory image.
Step 1: Open ‘Settings’ App in Windows 10 and go to ‘Update and Security > Recovery > Advanced Startup’ and click on ‘Restart’ button
Step 2: Insert Windows 10 installation media USB/DVD into computer and boot your computer with Windows 10 installation media USB/DVD inserted
Step 3: Now, select ‘Repair your computer’ on Windows installation media page and then select ‘Troubleshoot > Advanced Startup Options > Automatic Startup Repair or Automatic Repair’
Step 4: Follow on-screen instructions to finish the process. Once done, restart your computer and check if the issue is resolved.
Method 5: Run System Restore
If the problem is still persist, then you can try to fix the issue by performing system restore in computer. You can restore your computer to restore point when everything was working well.
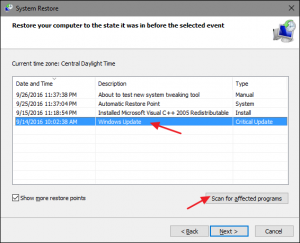
Step 1: Type ‘System Restore’ in ‘Windows Search Box’ and open it from results appear
Step 2: In ‘System Restore’ window, click on ‘Next’, select the restore point when everything was working well, and click on ‘Next > Finish’ to start restoring process.
Method 6: Reset Windows 10
If restoring Windows didn’t work, you can fix the issue by resetting Windows 10.
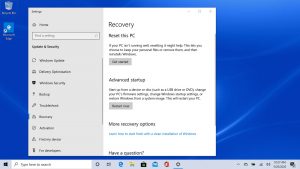
Step 1: Open ‘Settings’ App in Windows 10 and go to ‘Update & Security > Recovery’
Step 2: Select ‘Reset This PC’ in right pane, and select ‘Get Started’ button
Step 3: Select ‘Keep my files’ option if you want to keep safe you files, and follow on-screen instructions to finish resetting process. Restart your computer once finished.
Method 7: Check hardware problems
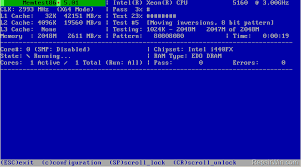
This issue can also be occurred due to some problems with hardware attached/integrated into your computer. You can manually check for the issue or take your computer to the technical experts to check hardware issue. You can also check hardware defects using ‘Memtest86 Plus’ tool – offers you to check for some types of hardware failure.
Download and burn Memtest86+ to DVD or USB flash drive:
Step 1: Connect USB flash drive to your computer and download & install Windows Memtest86 Auto-installer for USB key from Memtest.org official site
Step 2: Now, right-click on ‘Downloaded image file’ and select ‘Extract here’ option
Step 3: Once extracted, open the folder where extracted and run ‘Memtest86+ USB installer’
Step 4: Now, select your USB Flash drive to burn Memtest86+ software. This will format your USB drive
Step 5: Once done, insert USB flash drive to your computer and restart your computer.
Step 6: When restart initiate, select to boot from USB drive. Memtest86+ software will begin testing for memory corruption. It will show you the reasons behind System crashes like bad/corrupt memory. In such case, you need to replace your RAM if bad memory sectors are found.
Conclusion
I am sure this post helped you on How to fix ‘Windows 10 crashes in Safe Mode’ issue with several easy steps/methods. You can read & follow our instructions to resolve the issue. If the post really helped you, then you can share the post with others to help them. That’s all. For any suggestions or queries, please write on comment box below.


