What is Transmit failed general failure error in Windows 10?
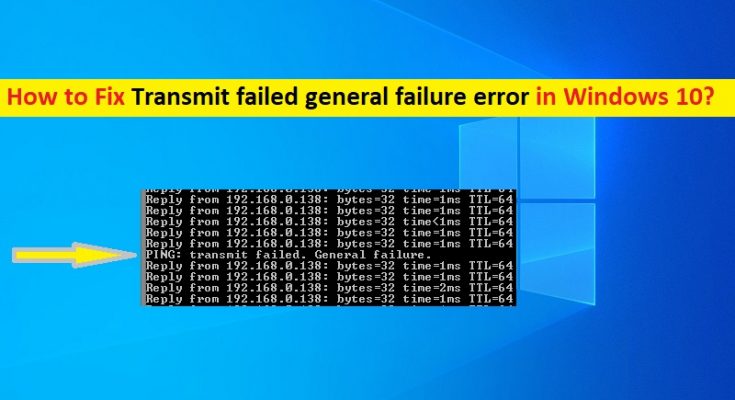
If you are facing ‘Transmit failed general failure Windows 10’ error while trying to run ‘Ping’ commands in Command Prompt on your Windows 10 computer, then you are in right place for the solution. Here, you will be guided with easy steps/methods to resolve the issue. Let’s starts the discussion.
‘Ping’ Commands: ‘Ping commands’ is valuable tool in Windows computer for troubleshooting all sorts of network or internet problems. Ping Command send packets of information to the devices on a network or internet to look if they available for the connection.
To run Ping Command in Command Prompt on Windows 10, you need to type ‘Ping XXXXX…’ command and hit ‘Enter’ key to execute. Here, you need to replace ‘XXXXX…’ with IP address or domain name of target. Once executed, your Windows computer will send four packets of information at one-second intervals.
However, several Windows 10 users reported that they faced ‘Transmit failed general failure Windows 10’ error while they tried to run Ping Commands in their Windows 10 computer. This issue indicates that Ping commands fails to execute and result in ‘General Failure’ error. Command Prompt doesn’t provide any additional information as to exactly why you are receiving the error while running Ping Command.
The possible reason behind this issue can be enabled IPv6 transition or tunnelling technology on your Windows 10. In such case, you can disable these options to resolve the issue. Also, outdated or corrupted DNS cache of your computer can cause this type of error. You can flush DNS of your compute in order to fix the issue.
Another possible reason behind this error can be misconfigured network adapter settings, corruption in system files or registry, malware or viruses attack and other reasons. It is possible to resolve the issue with our instructions. Let’s go for the solution.
How to fix Transmit failed general failure Windows 10?
Method 1: ‘Transmit failed general failure’ error with ‘PC Repair Tool’
You can fix your Windows PC problems with ‘PC Repair Tool’ in order to fix this error. This software offers you to find and fix BSOD errors, DLL errors, EXE errors, problems with programs, malware or viruses issues, system files or registry issues, and other system issues with just few clicks.
Method 2: Remove problematic software
Sometimes, this error is occurred if some applications are blocking HTTP traffic to or from your computer. In such case, you can uninstall such applications in order to fix the issue. Users reported that the issue is occurred possibly due to PeerBlock, Charles, Wireshark and AnyConnect Mobility Client applications. So, you can go to ‘Control Panel > Uninstall a Program > Programs & Features’, find and remove these programs one-by-one and once done, please check if the issue is resolved.
Method 3: Configure Windows to prefer IPv4 over IPv6 in Prefix Policies
One possible way to fix this issue is to deselect the IPv6 protocol in ‘Network Adapter Settings’ to disable it and use Prefix policies to prefer IPv6 over IPv4.

Step 1: Open your browser and visit ‘Microsoft Official site’
Step 2: Search or go for ‘Perfer IPv4 over IPv6 Prefix Polcies’, and download Microsoft Easy Fix 21066.
Step 3: Once downloaded, double-click on ‘Downloaded file’ and follow on-screen instructions so that tool may fix this problem for you. Once done, please check if the issue is resolved.
Method 4: Disable any and all IPv6-IPv4 transition technologies via Command Prompt
Step 1: Press ‘Windows + X’ keys on keyboard and select ‘Command Prompt as Administrator’
Step 2: Type the following command one-by-one and hit ‘Enter’ key after each to execute
netsh int ipv6 isatap set state disabled
netsh int ipv6 6to4 set state disabled
netsh interface teredo set state disable
Step 3: Wait to complete the process. Once done, please check if the issue is resolved.
Method 5: Reset your computer’s TCP/IP and Winsock Catalog via Command Prompt
Resetting computer’s TCP/IP and resetting Winsock catelog can resolve the issue. Let’s try.
Step 1: Open ‘Command Prompt as Administrator’
Step 2: Type the following command one-by-one and hit ‘Enter’ key after each to execute
netsh i i r r
netsh winsock reset
Step 3: Wait for the completion. Once done, reboot your computer and check if the error is resolved.
Method 6: Flush your computer’s DNS
As mentioned, this issue can also be occurred due to outdated or corrupted your computer’s DNS. You can fix the issue by flushing your computer’s DNS.
Step 1: Press ‘Windows + X’ keys on keyboard and select ‘Windows PowerShell (Admin)’
Step 2: Type the following command one-by-one and hit ‘Enter’ key after each to execute
ipconfig/release
ipconfig/renew
ipconfig /flushdns
netsh int ip reset c:\tcp.txt
netsh winsock reset
Step 3: Once done, close PowerShell and restart your computer to see the changes
Method 7: Reset your computer’s Hosts File
Step 1: Press ‘Windows + R’ keys on keyboard, type ‘notepad’ in the opened ‘Run’ dialog box and hit ‘OK’ button to open ‘Notepad’ window
Step 2: Type or copy & paste the following text in opened ‘Notepad’
# Copyright (c) 1993-2006 Microsoft Corp.
#
# This is a sample HOSTS file used by Microsoft TCP/IP for Windows.
#
# This file contains the mappings of IP addresses to host names. Each
# entry should be kept on an individual line. The IP address should
# be placed in the first column followed by the corresponding host name.
# The IP address and the host name should be separated by at least one
# space.
#
# Additionally, comments (such as these) may be inserted on individual
# lines or following the machine name denoted by a ‘#’ symbol.
#
# For example:
#
# 102.54.94.97 rhino.acme.com # source server
# 38.25.63.10 x.acme.com # x client host
# localhost name resolution is handle within DNS itself.
# 127.0.0.1 localhost
# ::1 localhost
Step 3: Now, save the Notepad document with ‘hosts’ name.
Step 4: Now, open ‘Run’ dialog box, type ‘%WinDir%\System32\Drivers\Etc’ and hit ‘Ok’ button to execute
Step 5: Now, locate the ‘hosts’ file, right-click on it and rename it to old
Step 6: Locate new ‘Hosts’ file and move it to ‘%WinDir%\System32\Drivers\Etc’ path. Once done, restart your computer and check if the issue is resolved.
Method 8: Enable all of ICMPv4-In rules in your computer’s firewall settings
Step 1: Type ‘Firewall’ in ‘Windows Search box’ and open ‘Windows Firewall with Advanced Security’ option from the result appear
Step 2: In the opened window, click on ‘Inbound Rules’ in left pane and locate each ‘Inbound Rule’ with ‘File and Printer Sharing (Echo Request – ICMPv4 In)’ title, right-click on it and click ‘Enable Rule’
Step 3: Once done, reboot your computer and check if the issue is resolved.
Conclusion
I am sure this article helped you on How to fix Transmit failed general failure Windows 10 with several easy steps/methods. You can read & follow our instructions to do so. That’s all. For any suggestions or queries, please write on comment box below.


