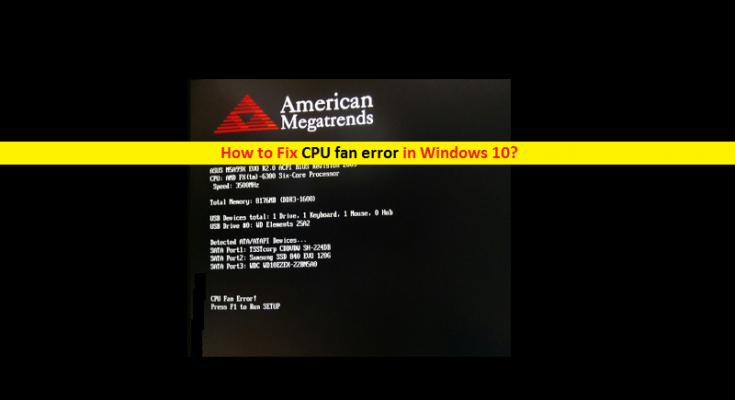
What is CPU fan error in Windows 10?
‘CPU fan error’ is commonly occurred on Windows OS computer for some reasons while trying log into Windows computer. This error is usually appeared when starting up Windows PC/laptop. One core reason behind this issue is CPU overheating or problem with CPU Fan. The error states that Windows operating System is unable to detect CPU Fan (hardware) that can cause overheating issue with CPU or it may result in permanent damage to number of other hardware components.
CPU Fan: It is just a Fan placed inside or attached to CPU/computer case used for active cooling. It is used to cool down your CPU, trigger cooler air into CPU case and expel the warm air from inside. CPU fan plays important role in reducing overheat inside CPU case. Note that CPU Fan is hardware component must be in working condition otherwise, it may trigger ‘CPU fan error’, computer overheating problem, or other issues.
‘CPU fan error’ appears in Windows 10 OS PC/laptop is appeared usually during System boot-up or start-up process. The error states that your Windows OS was unable to detect CPU Fan hardware. The error is appeared with text like ‘CPU fan error’ or ‘Error: CPU Fan Has Failed’. As mentioned, problem with CPU Fan hardware is one possible reason behind this error means physical damage to CPU Fan can cause this error.
Another possible reason behind this error can be incorrect System settings or external factors causing computer to overheat and force the fan to run at high speed. If you are facing the same error and looking for the solution, then you in right place for it. Here, you will be guided with easy steps to resolve the issue. Let’s go for the solution.
How to fix CPU fan error in Windows 10?
Method 1: Fix ‘CPU fan error’ in Windows 10 with ‘PC Repair Tool’
‘PC Repair Tool’ is easy & quick way to find and fix PC problems like BSOD errors, DLL errors, EXE errors, problems with files or applications, malware or viruses issue, and other System issues with just few clicks. This way, you can fix this CPU Fan problem. You can get this tool through button/link below.
Method 2: Change CPU Fan settings in BIOS
You can fix this issue by changing CPU Fan settings in BIOS. Let’s try.
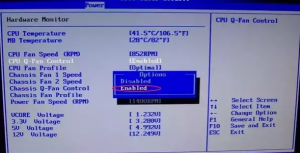
Step 1: Restart your computer and enter into BIOS screen by clicking ‘F2’, ‘F12’ or ‘DEL’ key on keyboard
Step 2: In the BIOS screen, click ‘Power’ tab and highlight the ‘hardware monitor’ option from dropdown
Step 3: Go to ‘CPU FAN SPEED’ option and change it to ‘IGNORED’
Step 4: Now, select ‘CHASSIS FAN SPEED’ option and change it to ‘N/A’
Step 5: Select ‘POWER FAN SPEED’ option and change it to ‘IGNORED’
Step 6: Now, press ‘F10’ to ‘Save Changes & Exit BIOS’. Once done, try starting your Windows computer and please check if the trouble is resolved.
Method 3: Lower the default FAN RPM value in BIOS
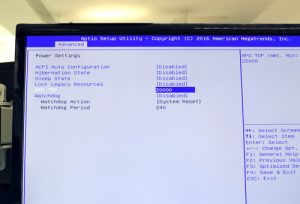
Step 1: Restart your computer and press ‘F2’, ‘F12’ or ‘Del’ key to enter into BIOS setting
Step 2: Using above method, navigate to ‘CPU FAN Settings’. This section might differ based on your motherboard.
Step 3: Now, locate the setting that regulates RPM warnings. The default value of RPM should be around 600.
Step 4: Lover the default value to ‘300 RPM’ and then save the changes and exit the BIOS
Step 5: Try starting your computer and check if the trouble is resolved.
Method 4: Check CPU Fan hardware
CPU fan error can also be occurred due to problem with CPU Fan hardware. Make sure CPU Fan hardware is in good condition.
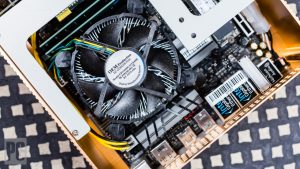
Step 1: Turn OFF your computer and remove power cable
Step 2: Open CPU/computer case, remove CPU Fan and clean the dust. You can use ‘Pressurized Air’ to clean.
Step 3: Now, place the CPU Fan into the slot correctly and turn ON your computer.
Step 4: Check the CPU Fan spinning speed. To reduce CPU temperature, re-apply thermal paste. Once done, please check if the problem is resolved.
Method 5: Replace CPU Fan with new one
If the above methods didn’t work, then you can try to fix the issue by replacing the CPU Fan hardware. If CPU Fan is problematic like not spinning accordingly, or other causing other issue, then you can replace the CPU Fan with new one and then check if the trouble is resolved.
Method 6: Use external Fans
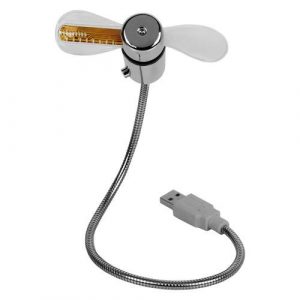
If CPU Fan hardware is not working properly or get corrupted, then you can also try external fans like electronic tower fans, household stand fans, USB fans and even AC (Air Conditioners) to cool down your CPU and CPU case. This way, you can reduce overheating.
Method 7: Decrease your CPU Usage
If overheating issue is still persist due to ‘CPU fan error’, then you can fix the issue by decreasing the computer usage. You can immediately go end all unnecessary programs, games, documents to take chances. You should stop the tasks that can take huge processor and memory that can help you to reduce CPU heat issue.
Method 8: Shutdown Windows computer and turn ON computer after few minutes
Overheating the CPU can cause several problems in computer. In such case, you can try to resolve the issue by closing your computer and wait to few minutes and then turn your computer ON. Once opened, please check if the trouble is resolved.
Conclusion
I am sure this post helped you on How to Fix CPU fan error in Windows 10 PC/laptop with several easy steps/methods. You can read & follow our instructions to do so. That’s all. For any suggestions or queries, please write on comment box below.
