What is Kernel Power 41 critical error on Windows 10?
In this post, we are discussing on “How to fix Kernel Power 41 critical error on Windows 10”. You will be guided with easy methods/steps to resolve the issue. Let’s starts the discussion.
‘Kernel Power 41 critical error’: It is common Windows problem associated with Kernel-Power critical error – Event ID 41. This error is usually occurred when you have turned OFF your computer but not in right way means improper shutdown of your Windows computer or continuous reboot Window PC can cause this type of error.
This Kernel Power 41 critical error is usually appeared in ‘Windows Event Viewer’ in your Windows 10 computer. If you are not aware, Windows Event Viewer is Windows 10 built-in tool designed to display a log of system and applications messages including warnings, information messages, and errors. There are often many errors shown in Windows Event Viewer, but you can ignore these errors if you computer is working properly.
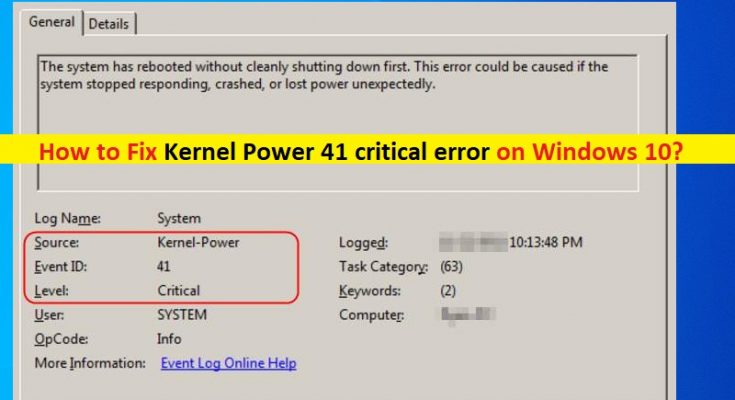
However, Kernel Power 41 critical error shouldn’t be ignored. This error can affect Windows stability. This Kernel-Power critical error – Event ID 41 indicates that your Windows computer has restarted without first cleanly shutting down, and this error occurs possibly if the system stops responding, crashes or losses power unexpectedly.
Kernel Power 41 critical error prevents your Windows 10 computer from shutting down correctly. This issue occurs possibly if you have recently added RAM (memory), additional devices or hard disk and then power supply failure issue occurs. Another possible reason behind the issue can be corruption in system files or registry, problematic graphics card & graphics card driver, malware or viruses attack and other reasons. Let’s go for the solution.
How to fix Kernel Power 41 critical error on Windows 10?
Method 1: Fix Kernel Power 41 critical error with ‘PC Repair Tool’
You can also try to fix your Windows 10 problem with ‘PC Repair Tool’ in order to fix this Kernel-Power critical error. This software offers you to find and fix BSOD errors, DLL errors, EXE errors, problems with programs, malware or viruses issue, system files or registry issue, and other system issues with just few clicks.
Method 2: Run SFC Scan and CHKDSK Scan
Corruption in System files and hard disk drives can be resolved with SFC Scan and CHKDSK Scan in order to resolve ‘Kernel Power 41 critical error’.

Step 1: Press ‘Windows + X’ keys on keyboard and select ‘Command Prompt as Administrator’
Step 2: Run SFC Scan. Type ‘sfc /scannow’ command and hit ‘Enter’ key to execute
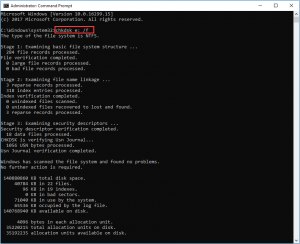
Step 3: Once executed, run CHKDSK Scan. Type ‘chkdks /r’ command and hit ‘Enter’ key to execute
Step 4: Wait to complete the process. Once done, restart your computer and check if the issue is resolved.
Method 3: Update graphics card driver in Windows 10
Updating Windows 10 drivers including graphics card driver can resolve this issue.

Step 1: Press ‘Windows + X’ keys on keyboard and select ‘Device Manager’
Step 2: Locate and expand ‘Display Adapters’ category, right-click on your graphics card driver, and select ‘Update Driver’. Follow on-screen instructions to finish installation process.
Step 3: Update other necessary device drivers and once done, restart your computer and check if the error is resolved.
Method 4: Update Windows 10 drivers [Automatically]
You can also try to update your all Windows 10 drivers with ‘Automatic Driver Update Tool’. This software will automatically find the latest updates for all Windows drivers, and then install them into your computer.
Method 5: Change Power Settings in Windows 10
One possible way to fix the issue is to change power settings in Windows 10.
Step 1: Type ‘Power Settings’ in ‘Windows Search Box’ and open ’Power & Sleep settings’
Step 2: Now, click on ‘Change when the computer sleeps > Change Advanced Power Settings’
Step 3: Double-click on ‘Hard Disk > Turn OFF hard disk after’ and set to ‘Never’
Step 4: After that, double-click on ‘Sleep > Sleep After’ and set to ‘Never’ and click on ‘OK’ button
Step 5: Once done, reboot your computer and check if the problem is resolved.
Method 6: Turn OFF Fast Startup in Windows 10
Another possible way to resolve the issue is to turn OFF Fast Startup feature in your Windows computer.
Step 1: Type ‘Power’ in ‘Windows Search Box’ and open ‘Choose Power Plan’ from results appears
Step 2: Now, click on ‘Choose what the power button do > Change settings that are currently unavailable’
Step 3: Deselect ‘Turn ON Fast Startup(recommended)’ option if enabled and then click ‘Save Changes’ button
Step 4: Once done, reboot your computer and check if the issue is resolved.
Method 7: Check your computer hardware
This issue can also be occurred due to some problem in your computer hardware. Users reported that after replacing their motherboard or power supply unit, this issue was completed resolved. So, you should make sure that your PC’s motherboard or power supply unit is not problematic, and/or other hard devices integrated into computer are not causing the problem.
You can resolve your hardware issue by replacing them with new one in order to fix this error. Or also you can reseat your RAM, hard disks and hardware components attached to your PC’s motherboard in order to fix the issue. To do so, you need to open your CPU Case, and remove RAM from its slots and clear the dust on RAM, and remove hard disk cable and reconnect it, and then attach the RAM to right slots again and close CPU case. This way, you can reseat your RAM and hard disk, and then turn ON your computer in order to check if the issue is resolved.
Conclusion
I am sure this article helped you on How to fix Kernel Power 41 critical error on Windows 10 with several easy steps/methods. You can read & follow our instructions to do so. That’s all. For any suggestions or queries, please write on comment box below.


