
When using computer many users occasionally encounter critical Blue Screen of Death errors. Most affected users report that the BSODs appear to be random and without detectable triggers. The problem is occurred on all versions of Windows based computer including Windows 7, Windows 8.1 and Windows 10.
Well, qcamain10x64.sys error is very irritating as when it appears the system start crashing and shut down unexpectedly. There are number of reasons why you could be encountering issues with error like this. Most of the issues concerning SYS files involve BSOD errors.
These types of errors can be caused by corrupt drivers, hardware problems, outdated firmware or other software related issues. Some of these errors include:
Qcamain10x64.sys could not be found.
Qcamain10x64.sys failed to load.
The file Qcamain10x64.sys is missing or corrupt.
Windows failed to start – Qcamain10x64.sys.
In order to solve the problem, there are various possible methods described under this article. Go through them one by one:
Method 1: Install latest Windows Update: As stated above, this error is caused due to hardware and software problems. In order to resolve such issue, it is suggested to update the Windows operating system to the latest updates. To download the updates, follow the given steps:
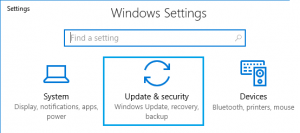
To open the Setting app, press Win + I
Now, go to Update and Security section
And Click for updates

If updates are available for download, click Install Updates
And after the update is completed, restart your computer.
Method 2: Updating/Reinstalling the Wireless LAN driver: The most culprits that might end up producing this error are problematic wireless LAN driver. In order to resolve it you either try to update the driver to the latest version or you uninstall it completely, switch to cable connection and allow Windows update to reinstall a replacement at the next startup. To do so, make sure you are connected to the internet via Ethernet cable so that Windows can search and download updated driver software.
To open run box, press Win + R > type “devmgt.msc” and press Enter to open Device Manager

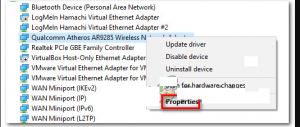
Once opened, scroll via the list of devices and expand the drop-down menu associated with Network Adapters
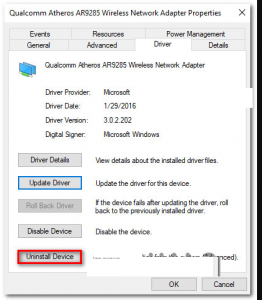
Next, right-click on Wireless Network Adapter driver and select “Properties”
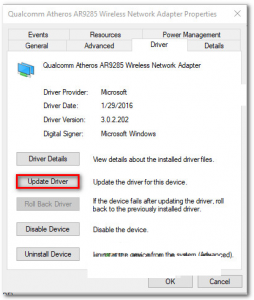
Once you are inside the properties screen, select the Driver tab and click on Update Driver
After that, click on Search automatically for updated driver software to force Windows Update to search for an updated driver version
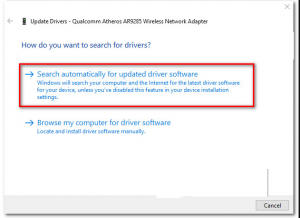
To install the updated version, follow the on-screen instructions and wait until the scan is completed
Even after updating, if you are still encountering this issue, follow steps 1 to 4 again, but this time click on Uninstall Device
After the driver is uninstalled, reboot your PC once again to allow Windows to install a replacement at the next startup.
Method 3: Run a disk Check: To perform a disk check, follow below mentioned steps:
Click on the Start menu and type cmd

Right-click on the cmd and choose Run as administrator
Click Yes when prompted. The command prompt opens.
Type chkdsk c: /f and press Enter.
Restart your computer to complete the scan
Recommended Solutions
Tried out all the given solutions and still getting qcamain10x64.sys error, then feel free to scan your system with PC Repair Tool. it is highly advanced repair tool that fixes PC errors such as BSOD error, application error, also protects your system from virus /malware attack and much more.


