
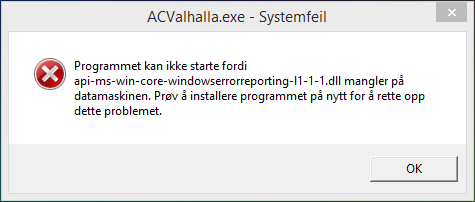
What is ‘Api-ms-win-core-windowserrorreporting-l1-1-1.dll missing’ error in Windows 10?
‘Api-ms-win-core-windowserrorreporting-l1-1-1.dll’ is DLL (Dynamic Link Library) file associated with Microsoft Windows Operating System. This DLL file is essential System file of Windows OS which contains a set of procedures and driver functions. This fill is also known as ‘ApiSet Stub DLL’. In case if this legitimate and essential DLL file is missing or corrupted for some reasons, then you might face serious System errors or issues in your computer.
If Api-ms-win-core-windowserrorreporting-l1-1-1.dll missing, it may negatively affect the work of associated software or games installed in your computer. Users reported they received this DLL file missing error when they tried to upgrade Windows 7/8.1 to Windows 10 OS version, or after Windows upgrade. This error is categorised as DLL Error. It is similar to ‘Something wrong when loading the dc_wff.dll’ Error, Downloader.dll is Missing or Not Found Error, Sechost.dll missing error.
It is also possible that you have accidently deleted ‘Api-ms-win-core-windowserrorreporting-l1-1-1.dll’ file or placed the file into another location instead of default System location. Another possible reason behind this issue is malware or viruses attack. Note that cybercriminals use the name some legitimate DLL file like ‘Api-ms-win-core-windowserrorreporting-l1-1-1.dll’ in malware camping.
Once they gain access to your computer, they can replace the original ‘Api-ms-win-core-windowserrorreporting-l1-1-1.dll’ file with malicious one or delete the original one. In such case, you should run System scan with some powerful antivirus software for malware or viruses, and check if trouble is resolved. However, this DLL file missing problem can also occur due to malicious software or faculty hardware, registry issues and other reasons. Let’s go for the solution.
Some command error related to ‘Api-ms-win-core-windowserrorreporting-l1-1-1.dll missing Error’:
- “api-ms-win-core-windowserrorreporting-l1-1-0.dll was not found”
- “api-ms-win-core-windowserrorreporting-l1-1-0.dll could not be located”
- “api-ms-win-core-windowserrorreporting-l1-1-0.dll Access Violation”
- “api-ms-win-core-windowserrorreporting-l1-1-0.dll is missing”
- “api-ms-win-core-windowserrorreporting-l1-1-0.dll error loading”
- “api-ms-win-core-windowserrorreporting-l1-1-0.dll crash”
- “The procedure entry point api-ms-win-core-windowserrorreporting-l1-1-0.dll error”
- “Cannot find api-ms-win-core-windowserrorreporting-l1-1-0.dll”
- “Cannot register api-ms-win-core-windowserrorreporting-l1-1-0.dll”
How to fix Api-ms-win-core-windowserrorreporting-l1-1-1.dll missing Error in Windows 10?
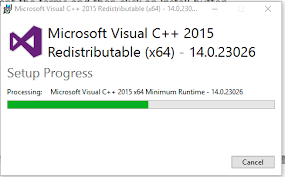
Method 1: Download & Install Microsoft Visual C++
You can fix this issue by reinstalling Microsoft Visual C++ Redistributable. Note that ‘Api-ms-win-core-windowserrorreporting-l1-1-1.dll’ is part of Microsoft Visual C++. If you don’t have this file, then you can get the file by reinstalling Microsoft Visual C++ Redistributable.
Step 1: Open your browser and visit ‘Microsoft Downloads Official’ site and search for ‘Microsoft Visual C++’
Step 2: Click on first link for the latest version and click on ‘Download’
Step 3: Select your Windows OS version like Windows 64-bit and hit ‘Next’
Step 4: Once downloaded, double-click on file and follow on-screen instructions to finish installation.
Step 5: Once done, please check if trouble is resolved.
Method 2: Download ‘Api-ms-win-core-windowserrorreporting-l1-1-1.dll’ Place the file into correct System location
Api-ms-win-core-windowserrorreporting-l1-1-1.dll missing issue occurs possibly if the file is not placed in right location. You can fix the issue by placing the file into right location.

Step 1: Open your browser and visit ‘DLL-Files.com’ website
Step 2: Search for ‘Api-ms-win-core-windowserrorreporting-l1-1-1.dll’ file and download the file depending of file versions.
Step 3: Copy the ‘Api-ms-win-core-windowserrorreporting-l1-1-1.dll’ file
Step 4: Open ‘File Explorer’ and locate ‘C:\Windows\System32’ folder on 32-bit OS, and locate ‘C:\Windows\SysWOW64’ folder on 64-bit OS
Step 5: Paste the copied file into this location and then restart your computer. Please check if the trouble is resolved.
Method 3: Re-register the ‘Api-ms-win-core-windowserrorreporting-l1-1-1.dll’ file
You can fix this issue by re-registering the missing DLL file.
Step 1: Press ‘Windows + X’ keys together on keyboard and select ‘Command Prompt as Administrator’
Step 2: Type ‘regsvr32 api-ms-win-core-windowserrorreporting-l1-1-0.dll’ command and hit ‘Enter’ key to execute. Once done, please check if trouble is resolved.
Method 4: Update System drivers
Outdated or corrupted System drivers can cause this type of error. You can fix the problem by updating the drivers.
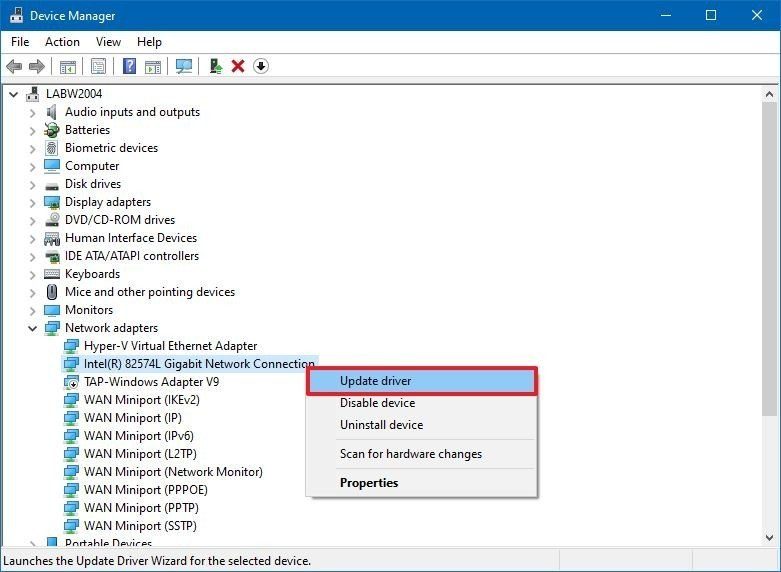
Step 1: Press ‘Windows + X’ keys together on keyboard and select ‘Device Manager’
Step 2: In the opened ‘Device Manager’, expand each device category one-by-one and check if any drivers are showing ‘Yellow Exclamation/questioned Mark’ on it. If yes, driver update is necessary.
Step 3: Right-click on the device with ‘Yellow Exclamation Mark’, and select ‘Update Driver’
Step 4: Follow on-screen instructions to finish the driver update. You can also download the latest driver for outdated driver from manufacturer official websites, repeat the same steps to update the driver.
Step 5: Once done, restart your computer and check if trouble is resolved.
Update System drivers [Automatically]
You can also try to update your device drivers using ‘Automatic Driver Update Tool’. This software will automatically find the latest drivers for Windows computer and then install them into computer. You can get this tool through link/button below.
Method 5: Run System Scan with ‘SpyHunter Antivirus Software’
Malware or viruses attack can cause ‘Api-ms-win-core-windowserrorreporting-l1-1-1.dll Missing Error’ or similar. In such case, you can fix the issue by running System Scan with some powerful antivirus software for malware or viruses. ‘SpyHunter Antivirus’ offers you to find and remove all types of malware or viruses in computer with just few clicks. You can get this software through link/button below.
Method 6: Run SFC Scan
SFC (System File Checker) – Windows built-in tool offers you to repair System files. This tool can help you to fix this issue.
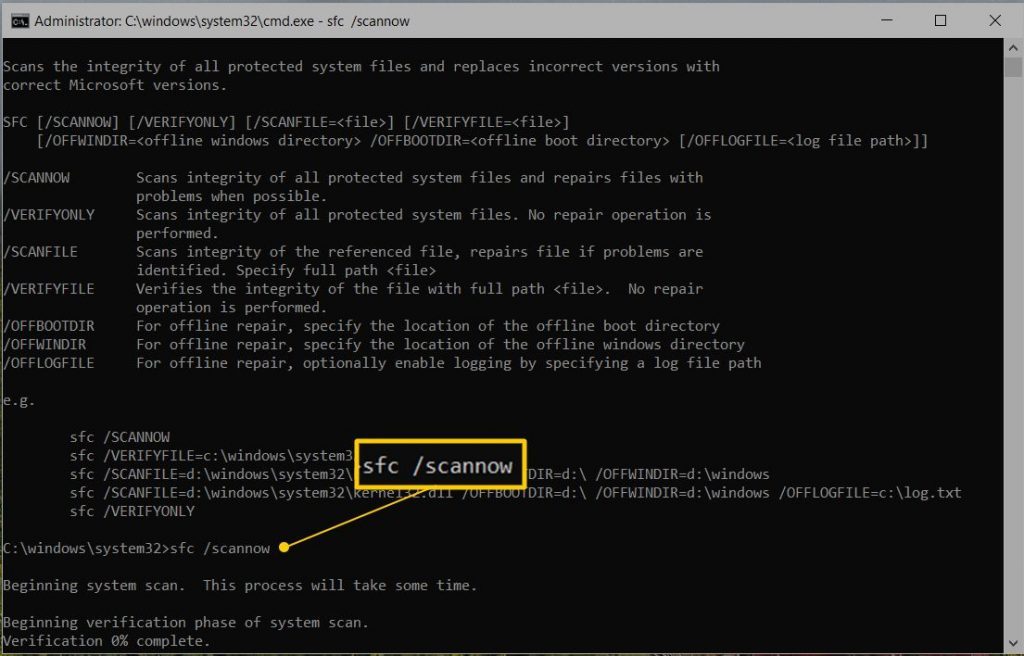
Step 1: Press ‘Windows + X’ keys together on keyboard and select ‘Command Prompt as Administrator’
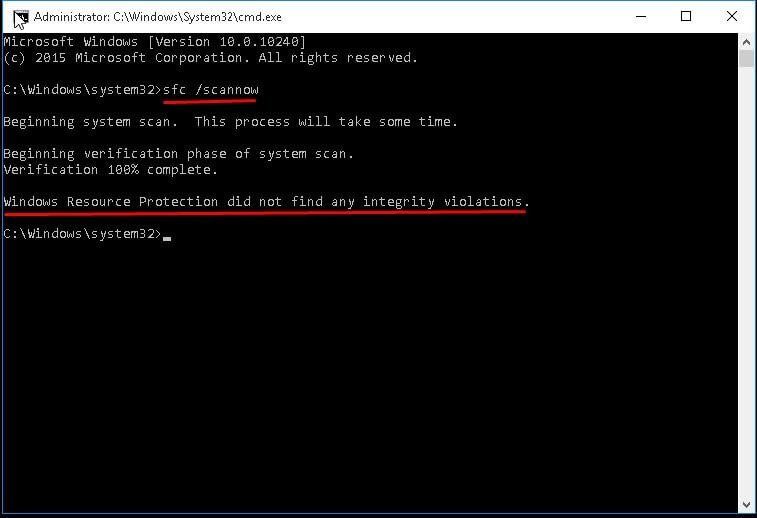
Step 2: In the opened ‘Command Prompt’, type ‘sfc / scannow’ command and hit ‘Enter’ key to execute
Step 3: If output of this command shows a message ‘Windows Resource Protection found corrupt files and successfully repaired them’, it means the issue has been resolved. If it shows ‘Windows Resource protection fond corrupt files but was unable to fix some of them’, it means the problem is still persists.
Note that ‘SFC Scan’ can’t fix the integrity errors for those System files that are currently being used by Operating System. To fix these files, you need to run ‘SFC Scan in Windows recovery environment’. To do so, follow the steps below.
Step 1: Press ‘Windows + I’ keys together on keyboard to open ‘Settings’ App in Windows 10
Step 2: Go to ‘Update & Security > Recovery > Advanced Startup > Restart Now’
Step 3: Insert Windows installation bootable USB drive into computer and run the System from bootable disk (Optional)
Step 4: Follow on screen installation, Select ‘System Restore > Troubleshooting > Advanced Settings > Command Prompt’
Step 5: Type the following command in ‘Command Prompt’ and hit ‘Enter’ key to execute.
sfc /scannow /offbootdir=C:\ /offwindir=C:\Windows
Step 6: Wait to complete the process. Once done, restart your computer and check if trouble is resolved.
Method 7: Perform System Restore
If you are unable to fix the issue with solutions mentioned above, then you can try to fix the issue with ‘System Restore’. System Restore offers you to restore your computer to a restore point when everything was working well.
Step 1: Press ‘Windows + R’ keys together, type ‘rstrui’ in ‘Run’ dialog box and hit ‘Enter’ key to open ‘System Restore’
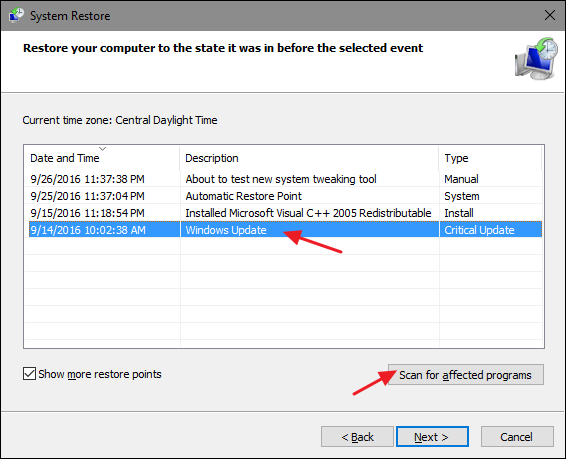
Step 2: In the ‘System Restore’ window, click on ‘Next’
Step 3: Choose any one restore point from the list and hit ‘Next > Finish’
Step 4: Wait to complete the process. Once done, reboot your computer and check if problem is resolved.
Method 8: Fix ‘Api-ms-win-core-windowserrorreporting-l1-1-1.dll Missing Error’ with ‘PC Repair Tool’
‘PC Repair Tool’ is easy & quick way to find and fix DLL errors, BSOD errors, System registry errors, malware or viruses issues, or other System issues with just few clicks. This way, you can fix this DLL file missing issue. You can get this tool through link/button below.
Conclusion
I am sure this post helped you on How to fix Api-ms-win-core-windowserrorreporting-l1-1-1.dll missing Error in Windows 10 with several easy steps. You can read & follow our instructions to do so. That’s all. For any suggestions or queries, please write on comment box below.


