Esent is a database engine that is part of the Windows operating system, it is safe and not a security risk. It has many uses in Windows including Desktop searches and indexing your media catalog in Windows 10.
Esent error 490 windows 10 is one of the irritating errors that appears when users try to update their Windows 10 system to version 18362.86. Some Windows users encounter this error inside Event Viewer.
When this error occurs, you will see in the event log the following error description:
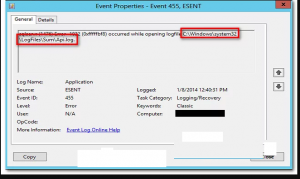
svchost (15692,R,98) TILEREPOSITORYS-1-5-18: Error -1023 (0xfffffc01) occurred while opening logfile
C:\WINDOWS\system32\config\systemprofile\AppData\Local\TileDataLayer\Database\EDB.log.
So, down here, in this article you will learn about the different techniques to get rid of this problem with ease.
Method 1: Complete the Corrected Path: In most cases, you will encounter this issue due to bad path that doesn’t exist in reality. In this case, you can manually repair the problematic path.
If you want to give this potential risk a try then go ahead and look at the error inside Event Viewer and see if there is some kind of mention of broken location like C:\WINDOWS\system32\config\systemprofile\AppData\Local\TileDataLayer\Database\EDB.log
Once done, open File Explorer and try to naturally navigate through the location. From the list, if any folders are missing correct the path and create a blank file so the scan can reach it.
Just after that, restart your system and see if these errors are still appearing.
Moreover, you can directly do this from elevated CMD prompt:
Press Win + R > type cmd > press Ctrl + Shift + Enter to open elevated Command Prompt. Once done, click Yes to grant admin access.
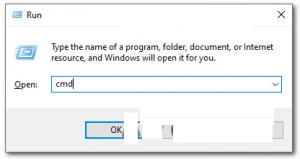
Inside it, enter the following commands and press Enter to ensure that path to TileDataLayer is complete:
cd config\systemprofile\AppData\Local
mkdir TileDataLayer
cd TileDataLayer
mkdir Database
After finishing, reboot your PC and see if the issue is fixed.
Solution 2: Run SFC and DISM scan: There is a possibility that this error occur due to corrupted or damaged system files. in such situation, you are advised to execute SFC and DISM scans. To perform SFC scan , follow below steps:
Go to Windows Search Cortana and type cmd
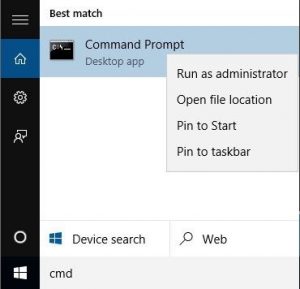
Right-click on Command Prompt and select Run as administrator
Inside it, type sfc/scannow and press enter to run this command
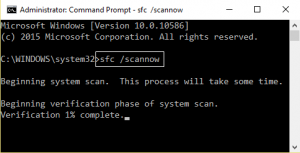
It will take time to scan the entire system files and fix the damage files.
After this, it is also suggested to run DISM command:
In Command Prompt, type DISM/Online/Cleanup-image/RestoreHealth and press Enter
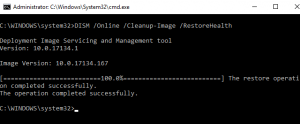
DISM command will also take more than 20 minutes to finish
After running these both command, you should check for the error that if it is still appearing.
Solution 3: Reset Windows Update Components: According to some affected users, you can expect to see this error due to some types of system file corruption that is affecting either Windows Update or Windows Firewall and ends up creating lots of different listings inside Event Viewer. To reset Windows Update components, follow below mentioned instructions:
Open the Command Prompt with admin privilege. To do this, press the Windows + X key and select Command Prompt (Admin) from the list
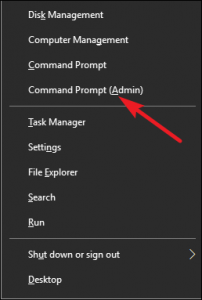
Inside the Command Prompt, type the below given commands. These will stop the BITS, Cryptographic, MSI Installer, and Windows Update Services:
net stop wuauserv
net stop cryptSvc
net stop bits
net stop msiserver
after it, type below given command as this will rename the Software Distribution and Catroot2 folder:
ren C:\\Windows\\SoftwareDistribution SoftwareDistribution.old
ren C:\\Windows\\System32\\catroot2 Catroot2.old
after the two folders have been renamed, run the following commands in order to re-enable the services that you previously disabled:
net start wuauserv
net start cryptSvc
net start bits
net start msiserver
Exit from the command prompt, type exit and press Enter
After completing these steps, repeat the WU action that was previously triggering the Event errors and see if the new events have stopped occurring.
Method 4: Installing Windows 10 Hotfix: Remember that Microsoft already aware of this issue and has released a fix that will take this particular issue. To implement it, you will simply need to install every pending update from the Windows Updates screen. Follow the below steps:
Press Win + R > type ms-settings:windowsupdate and press Enter to open up the Windows Update tab of Setting tab
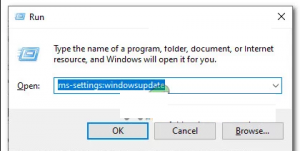
After that, go ahead and click on Check for Updates. Next, follow on-screen instructions to install every Windows update that is currently pending
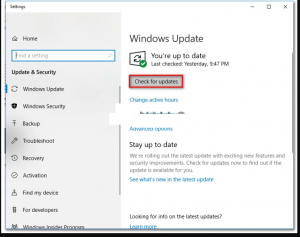
Once every pending update is installed, reboot your PC and see the Event Viewer to see if the new instances of esent error 490 have stopped occurring.
Alternative Solution to fix esent error 490 windows 10
If none of the above mentioned manual solutions worked for you, then go for an easy solution, try the PC Repair Tool. This tool is able to fix the PC internal issues and hence it might also help you to fix the esent error 490 windows 10. Besides this, this tool also fixes the DLL errors, game errors, corrupted registry, repairs damaged system files and much more.

